September is just around the corner, which means it’s almost time for back to school. While some may dread going back to school, we here at Luxy Hair think it’s a great opportunity for a new school wardrobe (hello fall fashion!), new friends, and of course, new hairstyles for school.
When it’s 8 a.m. and you’re running late to class, you need that perfect, cute hairstyle that looks put together, while being quick and easy enough to create in just a few steps. That's why we've put together the ultimate guide of our best hairstyles for school, with the help of our lovely friend Kassinka.
We'll run through how to style and store your Luxy Hair extensions for these hairstyles, the types of techniques you will need to know, and step by step instructions for 10 easy back to school hairstyles.
These 10 easy hairstyles are beautiful and chic, and most importantly, are quick, simple, and easy to create when you only have a few minutes before class. Follow along for our definitive guide to the best hairstyles for school.
First things first: hair extensions for back to school
While it may seem like having a set of clip-in hair extensions makes your hairstyles more complicated, being able to quickly clip a set of hair extensions in and achieve length and volume instantly will be a saving grace at school! Forget about teasing and fighting with your hair every morning—instead, roll out of bed, clip your extensions in, and go. It’s that easy. Best of all, if you have medium hair or short hair, hair extensions are the perfect solution to getting long hair and being able to create the easy hairstyles shown below.

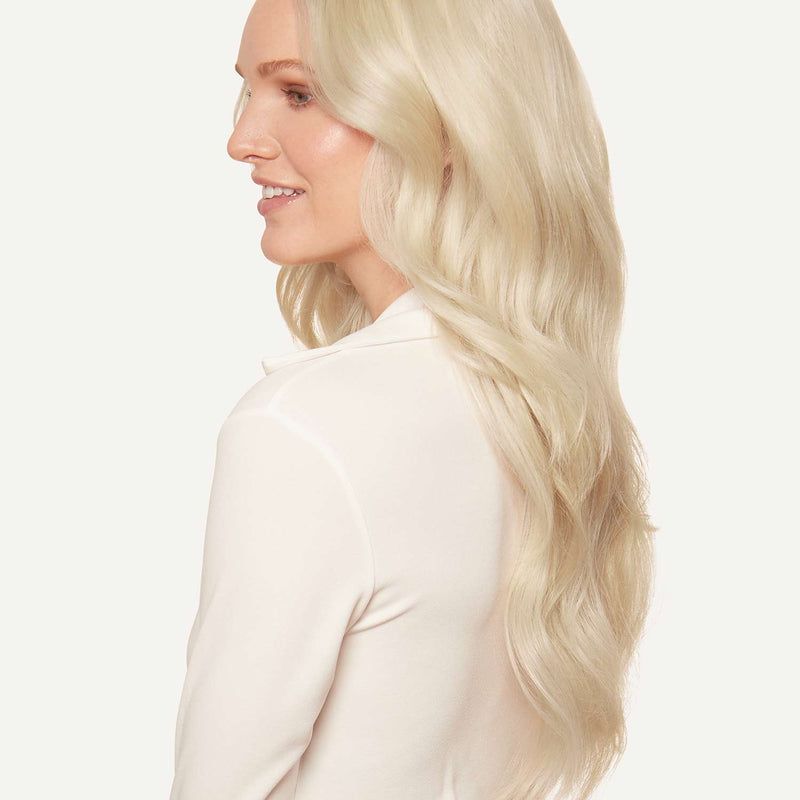
Kassinka wears her Seamless Blonde Balayage Luxies in this tutorial. Stumped on which shade is your perfect match? Check out this guide to choose your perfect shade of black hair extensions. Click here for brown hair, here for blonde hair, and here for red hair.
Pro tip: Keep your Luxies curled
Since Luxy Hair extensions are made with 100% remy human hair, they can be curled, styled and straightened, and retain their style until they’re washed. This means you can simply curl your extensions once, and as long as they are stored properly in their storage box, you can simply unbox, clip in, touch up, and go! An extra tip? Keep two sets of hair extensions: one straight and one curled, to avoid straightening and curling the same set according to your hairstyle. This will also help preserve their lifespan, doubling the amount of time they last until they need to be replaced.
Tips and tricks to curling your Luxies
1. Be sure to use a maximum heat setting of 250F, as anything higher may run the risk of damaging the extensions. While our own hair may be able to handle a high heat setting, our hair is also constantly getting revitalized from the scalp, whereas hair extensions don't get that sort of nutrition.
2. Always use a heat protectant spray prior to styling your set.
3. To make your curls last longer, roll each curl up, and pin the curls for 5-10 minutes to help them set, before unravelling and clipping your hair extensions in.
Before we begin, let’s run through some techniques you will be using in these back to school hair tutorials:
1. Fishtail braid
The fishtail braid is one of the most simple yet versatile braids to master, and if you nail this classic braid, you’ll have a world of hairstyle possibilities at your fingertips (literally!)
To create a fishtail braid, follow these instructions or watch the video below:
Step 1: Separate your hair into 2 sections
Step 2: Take a thin section of hair from the right section, cross it over, and combine it with the left section.
Step 3: Take a thin section of hair, this time from the left section, cross it over, and combine it with the right section.
Step 4: That’s it! Repeat these steps until you complete your entire braid. The smaller each section of hair you take, the more detailed and defined the fishtail braid will be.
2. Three-strand braid
The three-strand braid is the most basic braid there is, but can be used to spice up any hairstyle. Check out the video below to learn how to create one or following along step by step.
Step 1: Divide your hair into 3 sections: left, middle, and right.
Step 2: Take the left strand and cross is over the middle strand.
Step 3: Take the right strand, and cross it over the middle strand.
Step 4: Repeat steps 2 and 3 until all your hair is braided. Be sure to always keep the hair taught when braiding, otherwise the "stitches" will look loose and messy.
3. French Braid
A French braid is a more intermediate braid to master, however, once you understand the pattern, is quite easy to create! View the video below to learn how to create a French braid or reach our step by step instructions.
Step 1: Divide your hair into 3 sections: left, middle, and right.
Step 2: Take the left strand and cross is over the middle strand, just like a regular three-strand braid.
Step 3: Take the right strand, and cross it over the middle strand.
Step 4. Here's where things chance. Now, add a bit of hair to the left strand, then cross all the hair over the middle.
Step 5. Again, add some hair to the right strand, then cross it over the middle.
Step 4: Repeat steps 2 and 3 until all your hair is braided. By always adding a bit of hair to the strands, this ensures that all your hair is gathered into the braid, creating that signature French braid look.
4. Pancaking

This is a technique we always talk about here at Luxy Hair, as it's a super easy way to make your braids look thick and fluffy. To pancake a braid, all you do it hold it tight with one hand, then pinch and pull at the sides of the braid. Work carefully from the bottom of the braid up, and watch your braid double in size!
10 easy hairstyles for school
Hairstyle 1: Double twisted crown half-up hairstyle


Step 1. Separate your hair at the widest part of your head and clip a 4-clip weft in

Step 2. On either side of your head, separate your hair at the temple and clip a 2-clip weft in

Step 3. Gather your hair at the crown of your head, leaving pieces at the front of your face out. Twist the hair at the bottom, and secure with a clear elastic.

Step 4. Take the remaining pieces at the front of your face from one side, twist the hair and pull toward the back, securing with a bobby pin.

Step 5. Do the same on the other side.

Step 6. Pinch the twists and pull them apart slightly to fluff them up, and you're done!
This hairstyle is quick and easy but looks like you spent some time on it. It's our little secret.

Hairstyle 2: Half fishtail braid with messy bun


Step 1. Separate your hair at the crown of your head and clip a 2-clip weft in. This will add thickness to the fishtail braid you're about to create.
 Step 2. Gather half your hair around the crown, and create a fishtail braid. Secure with a clear elastic once you've braided about half of the hair.


Step 3. Pancake the braid to fluff it up.

Step 3: Gather all of your hair into a low ponytail. Instead of creating a normal ponytail, tie the elastic once around the hair, and when you go around the second time, leave half the hair in a bun.


That's it! This hairstyle has just the right amount of messiness, while looking polished with the added braid.
Hairstyle 3: Woven braids


Step 1. Clip a few wefts from your Luxy Hair extensions in, for added volume to your hair.
Step 2. Take a section of hair about 2 inches at the front of your head towards the top on the right side and 3-strand braid it towards the back. Secure the bottom with a clear elastic.

Step 3. Do the same on the left side.
Step 4. Create another thin 3-strand braid on the right side of your head at about the level of your temple.

Step 5. Do the same on the left side.
Step 6. Now you have 4 thin braids, 2 lower and 2 higher, and it's time to weave them. Take the lower braid on the left side and the higher braid on the right side. Bring them both toward the back of your head, crossing the higher braid toward the left side. Tie them together.

Step 7. Take the higher braid on the left side and the lower braid on the right side. Cross the higher braid toward the right side at the back of your head and tie them together.


You've now created a beautiful woven effect. If you want to get fancy, you can even add more braids!
Hairstyle 4: Low messy space buns


Step 1. Separate all your hair into two sections at the nape of your neck.

Step 2. Gather one side of your hair into into a low bun. Tie the elastic around the hair once, and on the second tie around, stop with half the hair still in the elastic.

Step 3. Repeat on the other side.

Step 4. Now, take the remaining hair that was left outside the ponytail, and messily twist it around the bun. No need to be super neat here, we're going for a messy look! When you're satisfied with your messy bun, secure the hair strand with a bobby pin.

Step 5. Repeat on the other side.

We love this fun, simple messy look, and it's perfect when you're short on time the morning.
Hairstyle 5: Messy fishtail braid crown


Step 1. Separate your hair on both sides at the temple, and clip a 2 clip weft from your Luxy Hair extensions.

Step 2. Gather a fairly large section of hair from one side and fishtail braid the section.

Step 3. Repeat on the other side.

Step 4. Pancake the braids, pulling them apart to make them messy and fluffy.

Step 5. Cross each strand toward the back of your head and secure the strands with bobby pin in the middle.


The key to this hairstyle is to keep the braids a little messy, channeling that boho chic vibe, so don't worry too much if the braids are falling out. It's all part of the look.
Hairstyle 6: Side braid into ponytail


Step 1. Take a large section of hair from the right side of your hair and create a three-strand braid.

Step 2. Pancake the braid.

Step 3. Gather all of your hair into a ponytail at the back of your head and tighten.


That's it! This is a lovely twist on a classic ponytail, and takes only a minute longer to create.
Hairstyle 7: Double fluffy braids


Step 1. Gather a large section of hair from the right side of your head and three-strand braid towards the back.

Step 2. Repeat on the left side.

Step 3. Tug at the hair at the roots, to create some volume and texture.

Step 4. Pancake each braid, pulling them apart to make them messy and fluffy.


And that's it! No, really. Who knew such a cute hairstyles could be so easy?
Hairstyle 8: Half-up messy bun with fishtail braid


Step 1. Gather a large section of hair at the top of the right side of your head and fishtail braid towards the back.

Step 2. Pancake the braid.

Step 3. Gather your hair at the crown of your head, and create a messy bun, leaving the fishtail braid you just created out.

Step 4. Take the fishtail braid and bobby pin it under the messy bun, leaving the rest of the braid free.


Hairstyle 9: Half French braid


Step 1. Separate your hair into three sections at the crown of your head.

Step 2. Take a section of hair from the left side and cross it over the middle.
Step 3. Take a section of hair from the right side, and cross it over to the middle side.
Step 4. Now, add a bit more hair from the left side and cross this new section over the middle.

Step 5. Continue this pattern, constantly adding more hair as your braid down, creating a French braid effect.
Step 6. Once you reach half way down your head, braid the rest of the hair normally in a three-strand braid.
Step 7. Pancake the braid, and you're done!


Hairstyle 10: low chunky fishtail braid


Step 1. Gather your hair into two sections at the nape of your neck.

Step 2. Take a large chunk of hair from the left side and cross it over to the right side.
Step 3. Take another chunk of hair from the right side and cross it over to the left side.
Step 4. Repeat this step 3-4 more times until you have a chunky fishtail braid start to form.

Step 5. Do not continue the braid and simply tie the hair off with an elastic as is.

This is a beautiful twist on a classic fishtail braid, and you can even spice it up by adding a hair accessory on top of the elastic!
We hope we've shown you that cute hairstyles for school don't have to take long, and can be quick and easy to create. School might sometimes be a bore, but your hair doesn't have to be! Now that you have your hairstyles down, you can spend more time decorating your new apartment, working on that new wardrobe, and getting yourself ready for an amazing new year at school.
Which back to school hairstyle is your favorite? Do you have any tips for those going off to school? Let us knwo in the comments below.