This video is a collaboration with the beautiful Sona from Simply Sona. We thought it would be fun to give you guys some hair and makeup tutorials that would be perfect for prom. Enjoy!
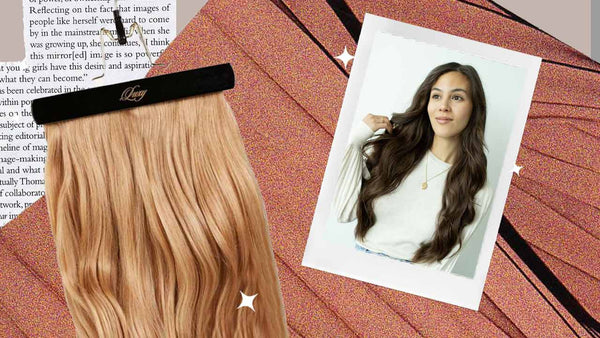
I'm wearing my 160g Luxy Hair Extensions in Ombre Blonde.
Hello my beautiful friends, it's Mimi here today. And today I'm going to show you how to create this beautiful prom hairstyle. It's sort of a half-up, half-down with beautiful three rosettes in the back. This is a great hairstyle, not just for prom of course. If you're not going to prom it would be a great hairstyle [00:00:30] to wear to a wedding or any kind of party. It looks absolutely beautiful in pictures. And another exciting thing about this hair tutorial is that I've teamed up with beautiful Sona from Makeup by Sona and she also created this fabulous makeup tutorial as well as hair tutorial for prom. So make sure to check it out. I'm going to link it down below, so check out the link and also at the end of the video. So let's get this party started.
I'm just going to start with curling my hair and before I do that, I'm going to quickly brush my hair to make sure there are no tangles. So, I'm already wearing my Luxies today and I'm wearing the Ombre Blonde Luxies for thickness and length. Once I've brush the hair, what I'm going to do is grab a clip, a hair clip, and clip the rest of the hair away. Like that, it just makes it easier. I just push the hair back with all the clip. And then I'm going to grab a nice one inch section and I'm going to curl it away from my face with a medium sized barrel. So it doesn't really matter what size it is, anything that's not too big or not too small will work.
So I'm just going to hold it away from my face, just hold it for a few seconds, anywhere from 10 to 15 to make sure it heats up. And then I'm just going to release this into my palm. Hold it, and then I'm going to grab one of these clips and just clip this away. Now this is going to allow for the curl to set while I'm curling all of my hair. And I'm just going to continue doing the same thing on all of my hair, and I'm just going to quickly speed up this process for you.
Once I've curled all of my hair and clipped it all away, this is what it looks like. Very nice hairstyle. The next step is spraying everything with hairspray as it sets. I'm just using organic Rahua hairspray, and I'm just going to mainly focus on the ends of the hair that are curled. Spray it all and just wait for it to dry for a few minutes. Now I'm going to start taking the clips out and unleashing the curls. As you can see, they're really nice and bouncy, perfect.
All right, so once I've taken out all the clips, this is what my hair looks like. It's very nice, soft, and bouncy waves. The next step is just to add a little bit more of texture and definition to my curls. I'm just going to be adding this organic John Masters Hair Pomade. Just a little bit is enough. Just going to rub it in my hands and scrunch it in my hair. So I'm going to do it on the left side first, and then grab a little more of the product, maybe a little more, and do the same thing on the right side. This always adds nice shine and definition.
All right guys, now I'm going to turn around and show you how I'm going to be creating beautiful roses in the back of my head. I'm going to start off with my left side and I'm just going to grab a section of hair that's not too thick, and I'm just going to leave my bangs out as well. Then I'm just going to twist this section. And as I twist the section, I'm going to start rolling it into a circle. So I keep twisting it until the end, and then sort of hide the ends into the circle. And here I'm just going to need a couple of bobby pins to pin this hair rosette in place. Perfect.
Now I'm going to move on to the middle of my head, and I'm going to do the same thing here. I'm going to grab a medium sized section, and then I'm also going to start twisting it. And as I twist it, I also twist it into a circle. And I roll it, roll it, roll it to the end. Hold that in place with my left hand or right hand, whatever works. And then just pin it, and sometimes if you feel like yo need another bobby pin, if your hair is thicker perhaps, then you're going to need another one.
And then the last section, I'm going to pull it from the right. And I'm also going to start twisting it, and as I twist it, I roll it into a really beautiful hair rosette. And once I've rolled it into a hair rosette, I'm just going to secure it in place with bobby pins. At this point you can adjust anything that needs to be adjusted, or add more bobby pins. I'm pretty much finished. Yay.
And that is it for today, my beauties. Thank you so much for tuning in. Make sure to check out Sona's take on prom hair and makeup, I think she did such an amazing job. Thank you, guys, so much for tuning in. Make sure to leave me a comment down below, I love reading your comments and be sure to like this video. Have a beautiful day and I'll see you next week. Bye!