
Ever since the Pinterest explosion a few years ago, there have been an abundance of amazing hairstyles showcased all over their website - and if you're like us, you have hundreds and hundreds of braid hairstyles, updos, half-up hairstyles, wedding hairstyles (even though you're no where close to getting married), prom hairstyles (even though you graduated years ago), short hairstyles, hairstyles for long hair and everything in between pinned to your hair and beauty boards. Don't worry, we do too.
Well, we're sure you can relate to this: every time you try to recreate one of these fabulous hairstyles, something just seems...off. Either your braid is thin and floppy, your hair just looks flat and sad, and those beach waves just look stringy. What's a girl to do?!
Here's a secret: all those beautiful girls modelling Pinterest hairstyles are likely wearing hair extensions to give their hair extra thickness volume, lift, and all around oomph! Isn't it a great thing then, that Luxy Hair extensions are perfect for adding fullness to your hair to re-create perfect Pinterest hairstyles? We've teamed up with our friend Alex this week, to show you how to quickly and easily recreate 3 Pinterest hairstyles that you can show off proudly.
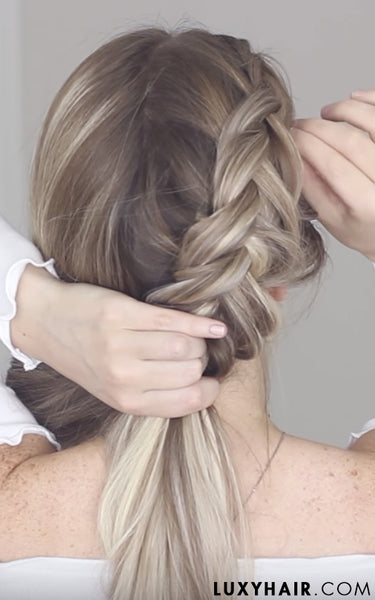
Hairstyle 1: Braids on Braids
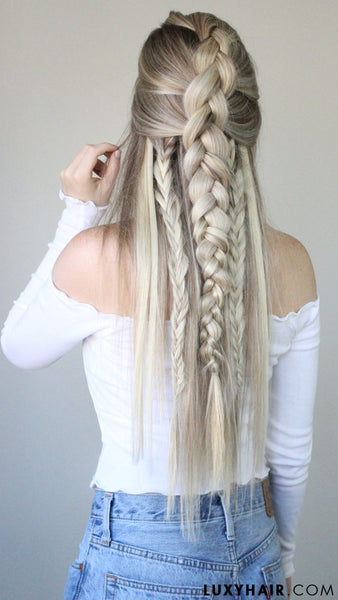
This hairstyle just screams Pinterest hair, featuring a chunky Dutch braid and Fishtail braids.
Step 1: Separate your hair at your ears and clip in a 4-clip weft to give your braid volume at the ends. Then, separate your hair at your temples and clip in another 4-clip weft for volume at the upper section of your braid. Finally, clip a 1-clip weft at the top of your hair in the middle, to ensure that your braid has volume at the top.
Step 2: Take all the hair at the top of your head and separate into 3 equal sections. Take the left strand and cross under the middle strand. Take that same strand and cross over the right strand. Then, take the left strand again and cross under the middle strand for an un-done, effortless look.
Step 3: Start Dutch braiding by gathering the hair above your temple and adding it to the right strand of your braid. Then, cross it underneath the middle strand. Do the same on the left side.
Step 4: Once your braid reaches the bottom of your ears, start pancaking the braid by pulling on the outside on the braid to make it as big and voluminous as possible. Then, pull a little on the sides to make the hairstyle look more relaxed.
Step 5: Continue 3 strand braiding the rest of the ponytail. As you get farther down the ponytail, start braiding tighter and tighter, so that the braid goes from big to small. Once you're done braiding, secure with an elastic.
Step 6: Pancake some more! Pull the sides of your braid out again, making the whole thing full and voluminous.
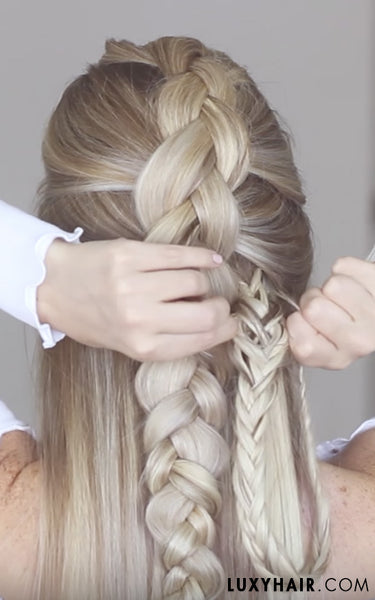
Step 7: Add a 1-clip weft underneath the lowest part of the Dutch braid on each side.
Step 8: Start Fishtail braiding by gathering a section of hair about the same width as the 1-clip weft. Separate this section into 2 pieces, then, bring a piece from the outside of the right section, cross it over and join it with the left section. Do the same on the left side. As you go down the Fishtail braid, you can switch up the sizes of sections you're grabbing to make the braid look super effortless. Click here if you'd like to learn how to create a simple Fishtail braid.
Step 9: Once the braid is complete, tug on the sides to make it appear fuller, and secure with an elastic.
Step 10: Create another Fishtail braid on the left side of your head.
And you're done! This Dutch Braid and Fishtail Braid combo is soo "Pinterest" and so pretty. We just love it!
Hairstyle 2: Double Dutch Fishtail Braids into Messy Bun
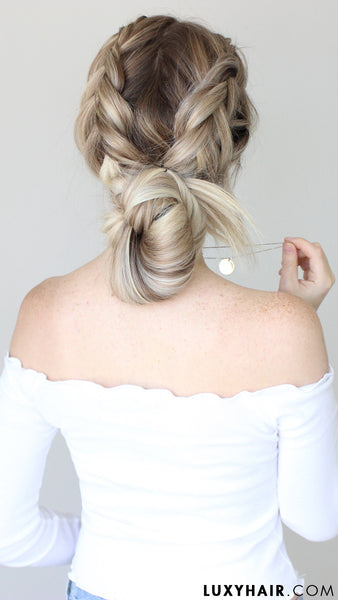
This second Pinterest hairstyle mixes up Double Dutch Fishtail braids and a messy bun. It's so effortless and so easy to recreate.
1. Separate all your hair into 2 sections and clip the left side out of the way for now.
2. Take a 3-clip weft and fold it on itself, clipping the clips onto the hair. This ensures that you are only working with 1 super thick 1-clip weft to make your braid nice and big. Clip this weft on the right side of your head at your temple.

3. Start Dutch Fishtailing the right side of your hair. Take a section of hair at the top of your head, and divide it into two sections. Take a section of hair from the outside of the left strand, and cross it underneath the right side. Then, take a section of hair from out outside of the right strand, and cross it underneath the left strand. Here's another tutorial on how to create a Dutch Fishtail braid for more guidance.
4. Pick up some hair beside the left strand and join it into the section, then cross it underneath the right strand. Pick up some hair beside the right strand, join it into the right section, then cross it underneath the left strand.
5. Continue this pattern all the way down your head, and take bigger sections once you reach the temple of your head. Don't worry if your Dutch Fishtail Braid doesn't look like much right now! The farther you braid, the more your braid will start taking shape.
6. Once your braid reaches your neck, stop braiding and start pancaking! Once you have a giant braid, clip it at the end and away for now.
7. Now, repeat steps 2-6 with that left section that you originally clipped away.
8. At this point, you will have 2 braids reaching the nape of your neck. Tie the braids together into 1 ponytail in the middle.
9. Create your favourite messy bun.
And that's it! You're now ready to show off your Pinterest hairstyle.
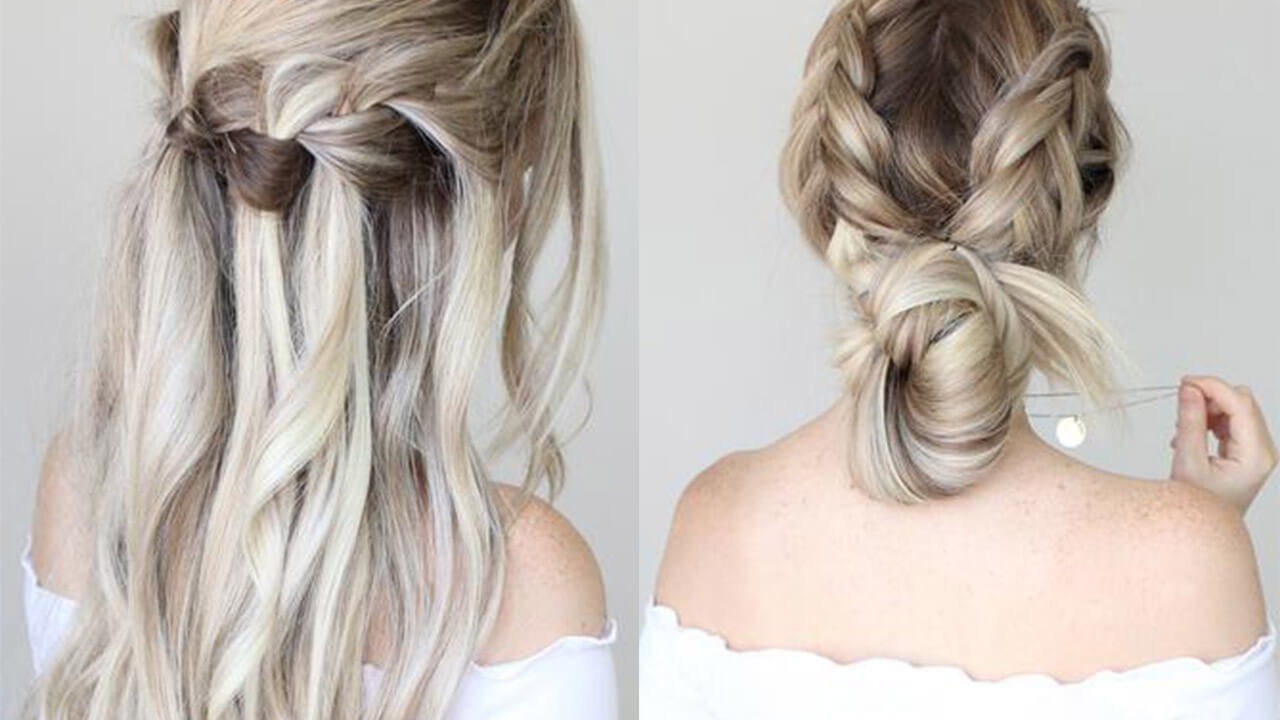
Hairstyle 3: Voluminous Waterfall Braids with Beach Waves

We're obsessed with this Pinterest hairstyle! The best part? It can be created for long hair or short hair.
Step 1: Section of your hair at the crown of your head and clip it away for now.
Step 2: Grab a section of hair at your temple, leaving out a few front pieces to frame your face. Divide this section into 3 pieces and do one full pass of a 3 strand braid.
Step 3: Clip a 1-clip weft in underneath the start of your braid and join it into the right and middle sections. this will help give your waterfall braid extra volume.
Step 4: This is where it gets fun! Take about a 1-inch section of hair beside the left pieces and join it into the strand. Then, cross it over the center piece.
Step 5: To create the waterfall braid, let the right strand go and grab a new 1-inch section of hair to replace it. Then, cross this piece over the middle strand.
Step 6: Add a small piece of hair to the left strand, join it in, and cross it over the middle section.
Step 7: Repeat Step 5 and continue this pattern and keep waterfall braiding until you reach the center of the back of your head. Once you reach the center, clip away the braid for now. Need more instructions? Here's another step-by-step Waterfall Braid tutorial.
Step 8: Repeat steps 2-7 with the left side of your head.
Step 9: Once you reach the center of your head meeting your right braid, let the top of your hair that you had originally clipped away fall in between the two braids.
Step 10: Secure your two braids together into a ponytail in the middle.
Step 11: Curl all your hair, curling the waterfall pieces separately to make them pop.
Step 12: Now it's time to define your braid and get it looking super Pinterest-y. Spray some hairspray on your waterfall braid for extra hold. Then, push each waterfall piece up and pull on the bottom of the waterfall braid as well. Lastly, don't forget to pull on the top middle section for extra lift in the back!

And voila! Your Pinterest perfect hair is all ready to go.
Which hairstyle is your favorite? Be sure to recreate these hairstyles and share them on Pinterest!