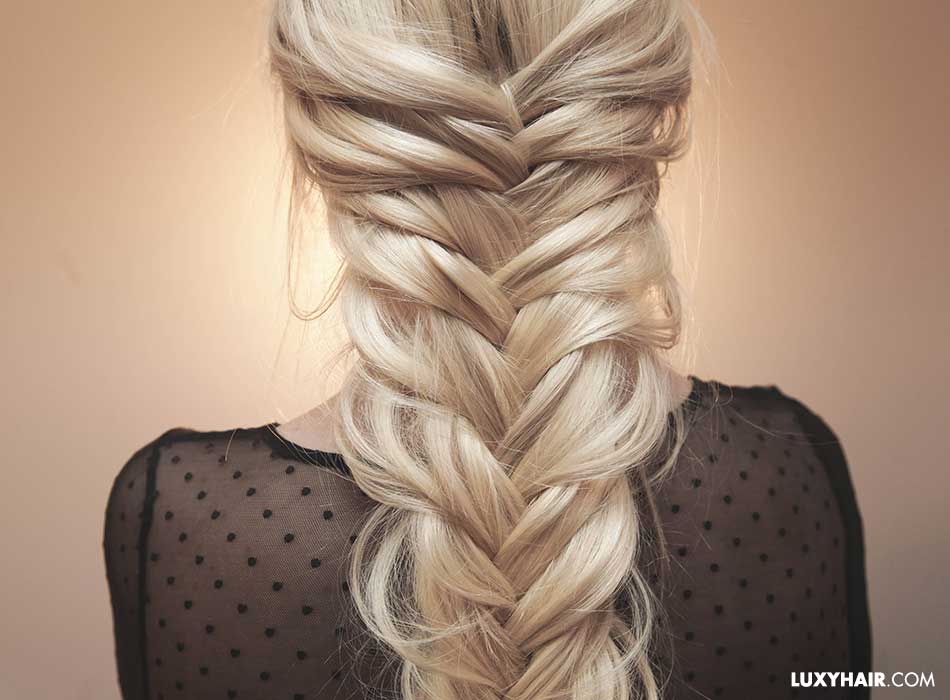
Have you ever wondered how Princess Jasmine’s bubble braid is so thick and fluffy, or how Elsa’s braid has that larger than life volume? Well, other than the fact that they’re animations, we’re here to let you in on a special secret so you can achieve long, full thick braids that would make any Disney princess green with envy.
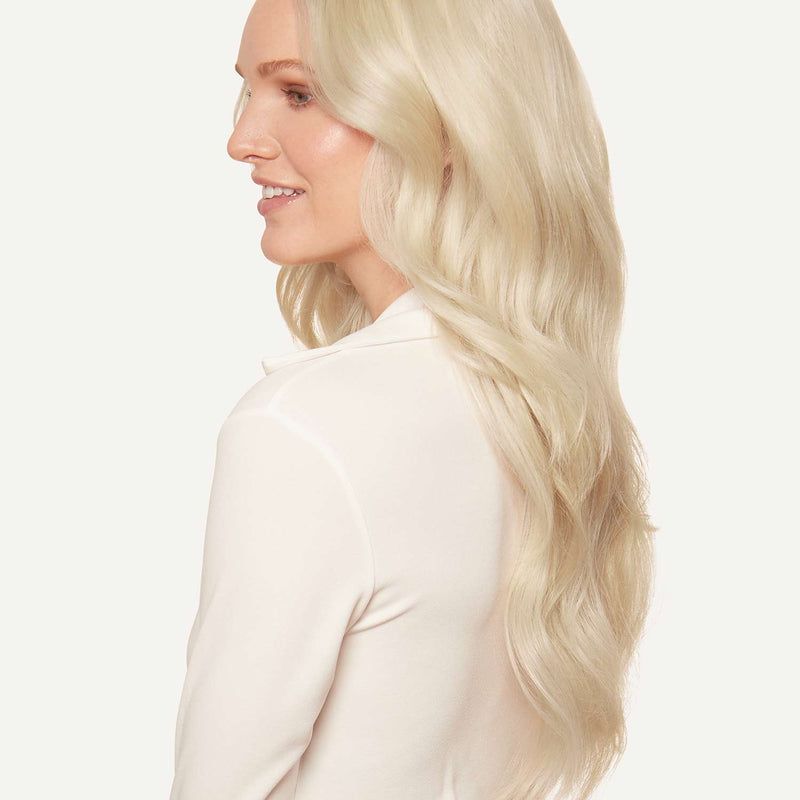
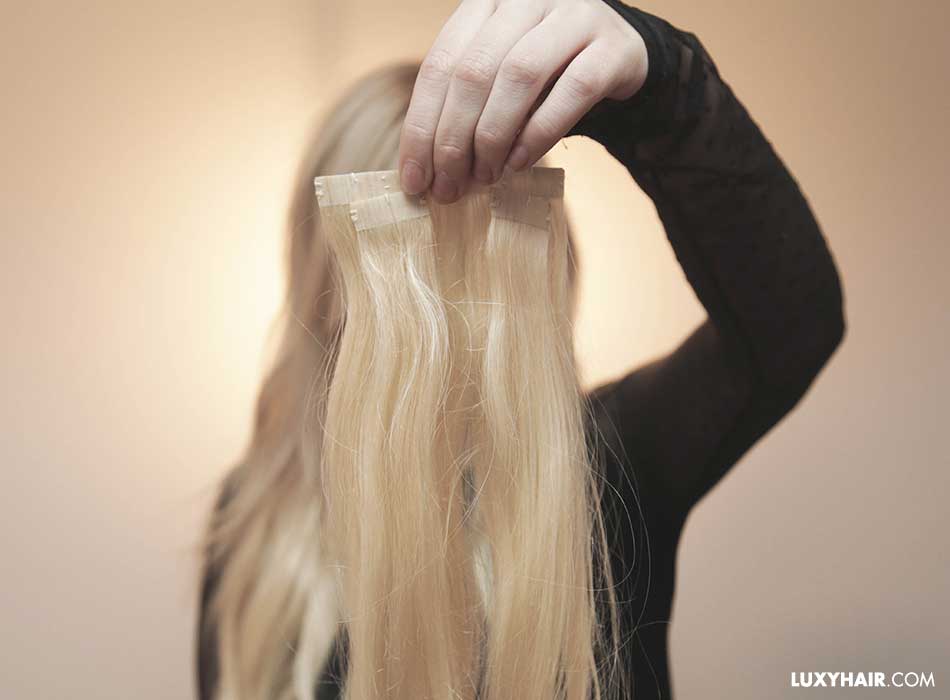
 @kassinka wears Seamless Platinum Blonde Luxy Hair extensions
The answer is hair extensions. Individual wefts of hair placed strategically throughout your head when braiding your hair can make a whole new world of difference when it comes to your braids, breathing new life and lift into them. From the basic 3-strand braid to the fishtail braid, to the Dutch braid, follow along for step by step instructions on how to add hair to braids and achieve those full, thick braids you’ve always dreamed of.
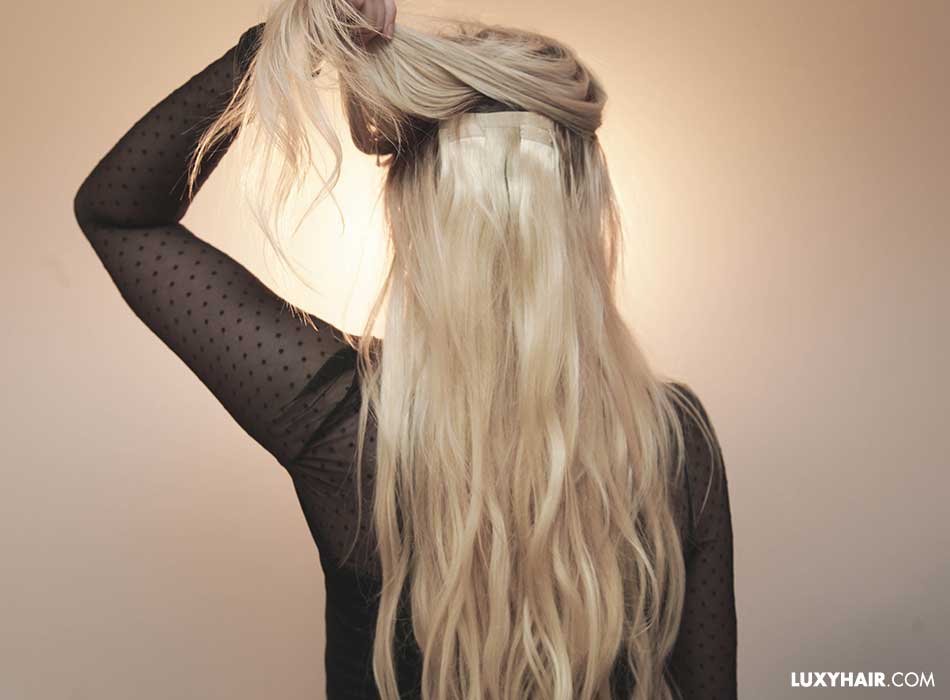
Oh, and in case you were wondering, real-life celebrities, princesses, beauty bloggers and more, all use hair extensions to enhance their natural hair, including our friend Kassinka in the tutorials below. Kassinka wears her Seamless Platinum Blonde Luxy Hair extensions for extra thickness and volume in her braids.
How to add hair to braids
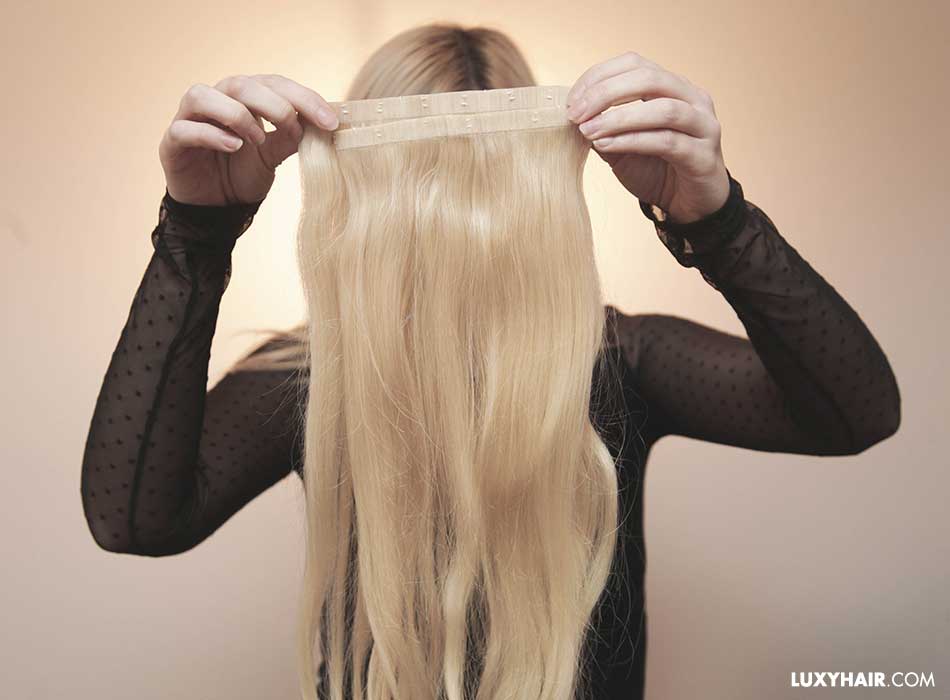
You can either use your Classic or Seamless Luxy Hair extensions for these tutorials, however, Kassinka uses her Seamless Platinum Blonde extensions as they lie totally flat against the head. Not sure which set is right for you? Check out the differences between our Classic and Seamless collection here.
When adding hair extensions to braids, the key to creating those long, thick braids is to have most of the volume toward the bottom and sides of your head, otherwise, the ends of the braids tend to look stringy. Avoid clipping in wefts at the temples like you usually would when leaving your hair down, and try to keep most of the thickness and volume below the crown of your head. In the following three tutorials, Kassinka shows you a foolproof way to clip your hair extensions in and add hair to braids, which will allow you to create three different braids.
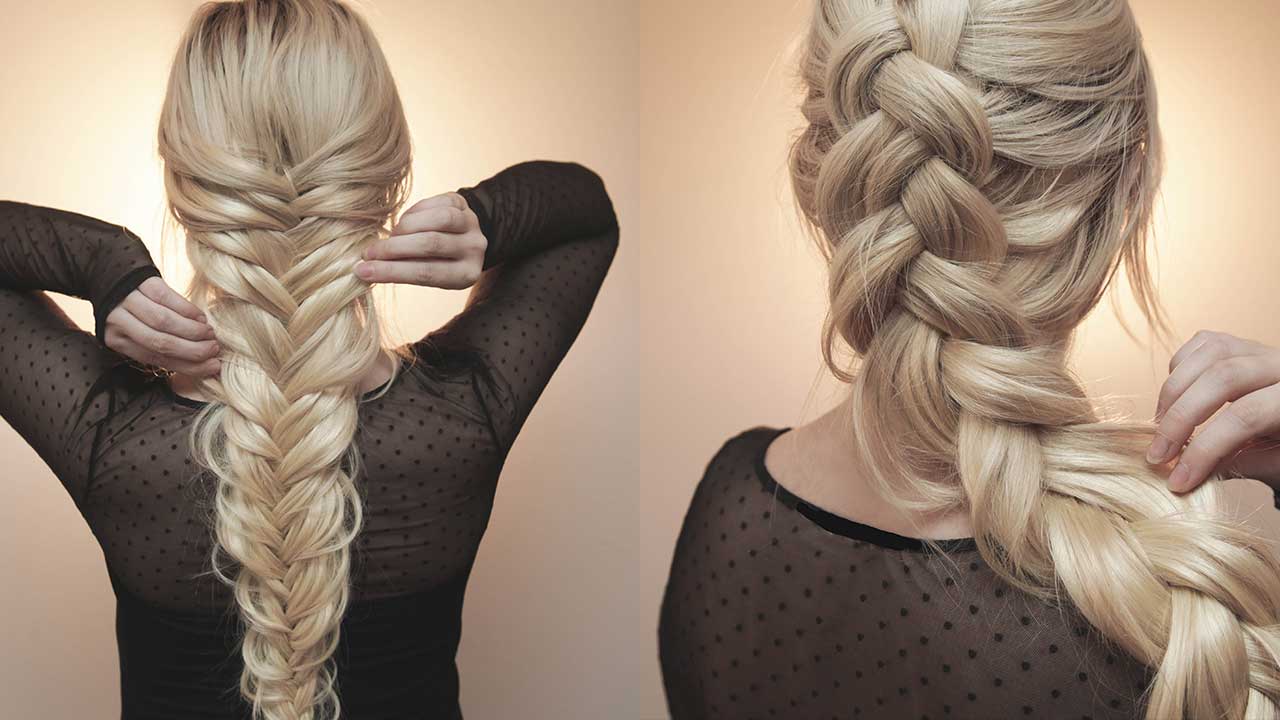
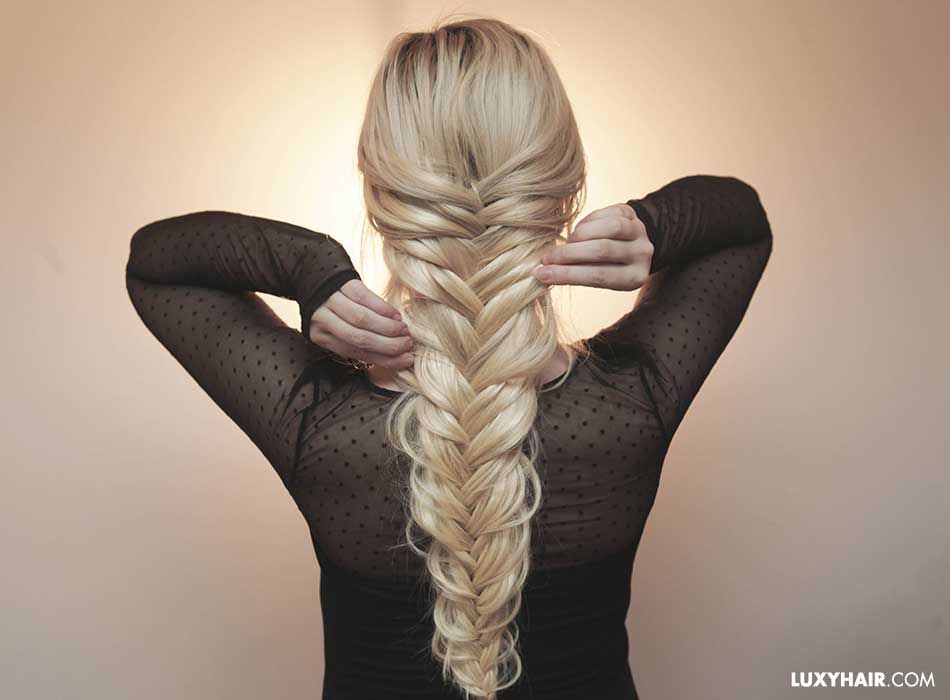
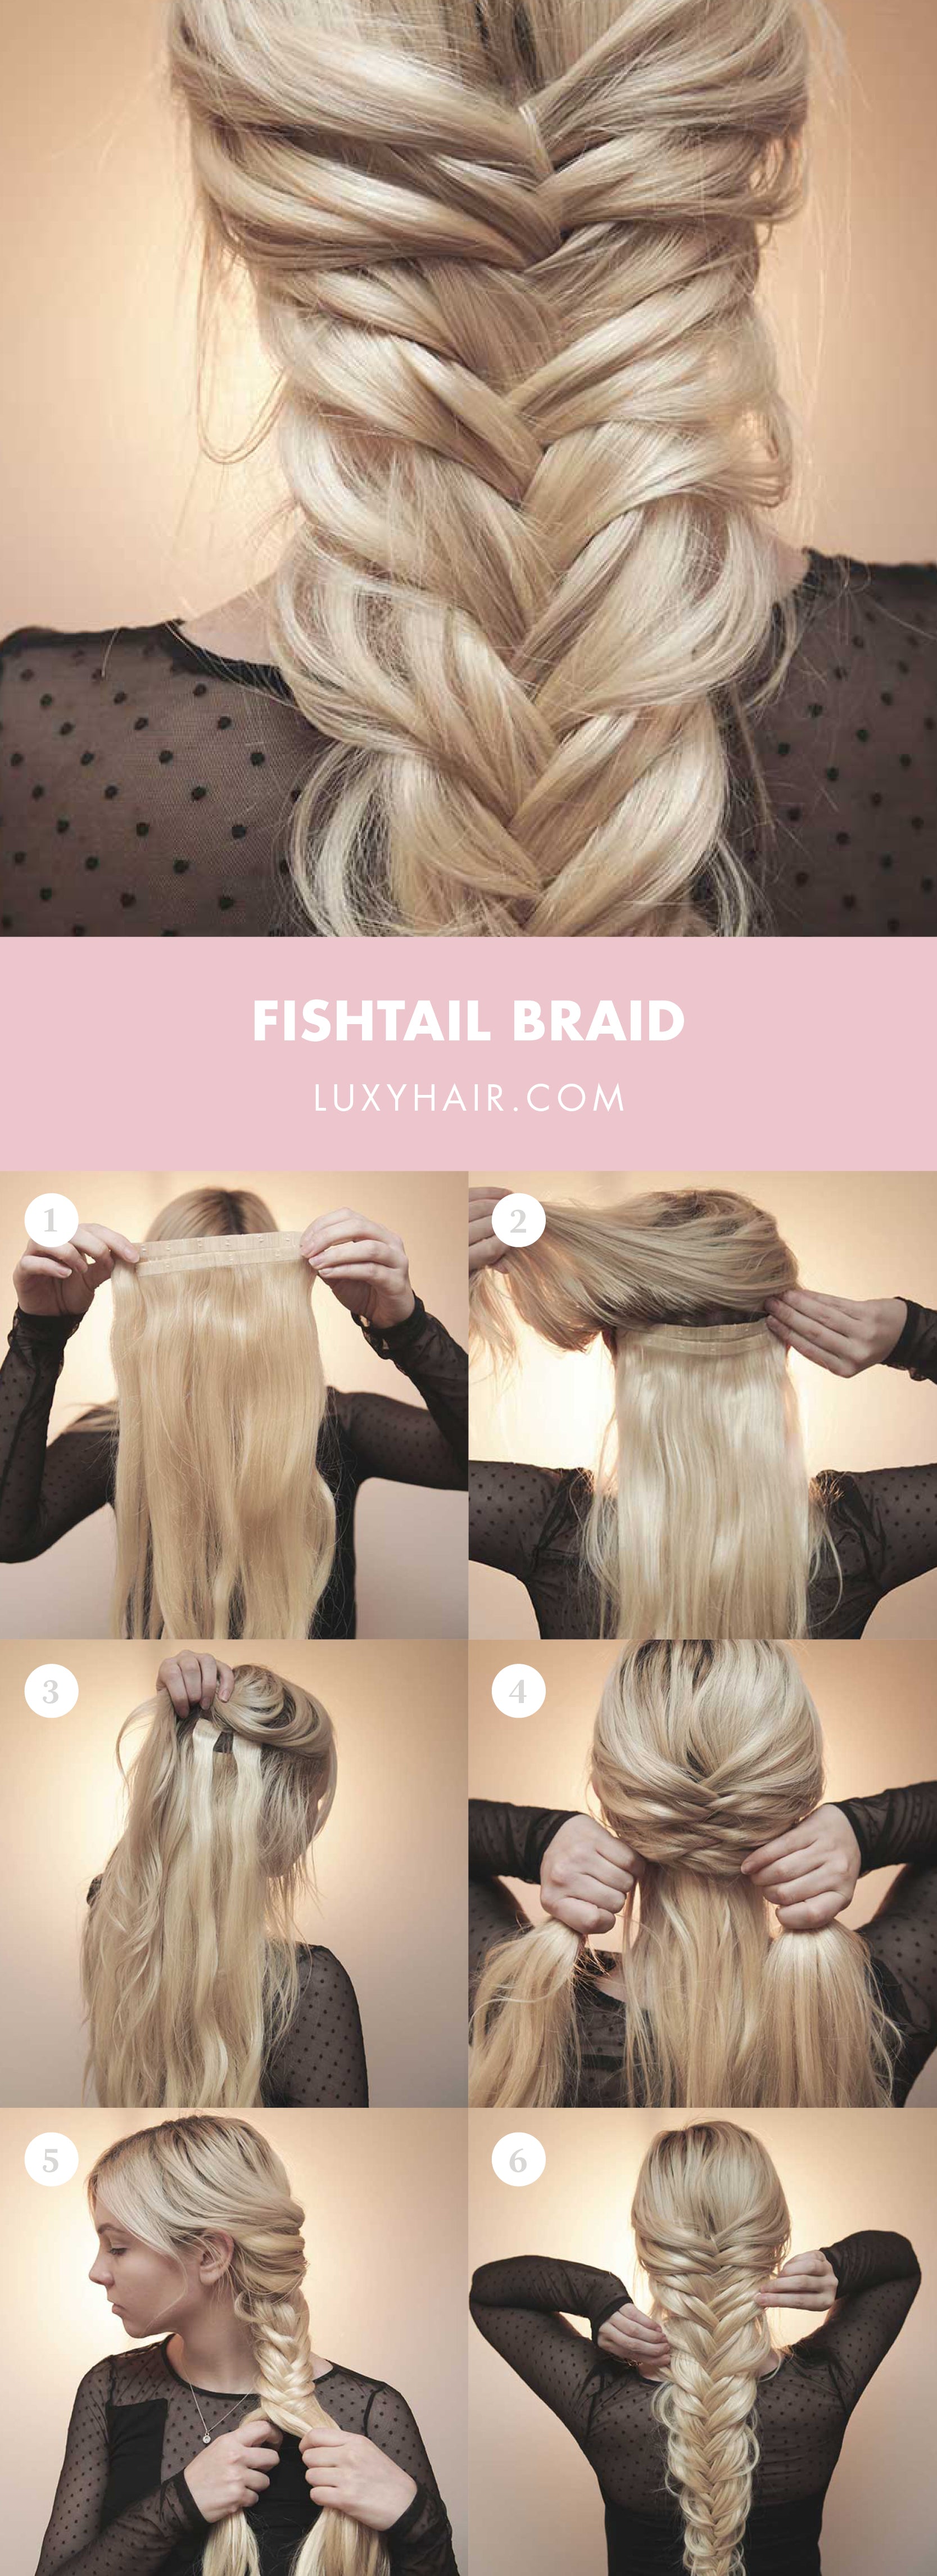
How to get a thicker fishtail braid instantly
 @kassinka wears Seamless Platinum Blonde Luxy Hair extensions
Step 1
Gather your Luxy Hair extensions. Take a 4-clip weft and a 3-clip weft, and stack them together by clipping the 3-clip weft on top of the 4-clip weft. Then, separate your hair just below the ears and clip this stacked mega-weft in.
Step 2
Take another 4-clip and 3-clip weft and stack them together. Separate your hair at the level of your ear and clip the mega-weft in.
Step 3
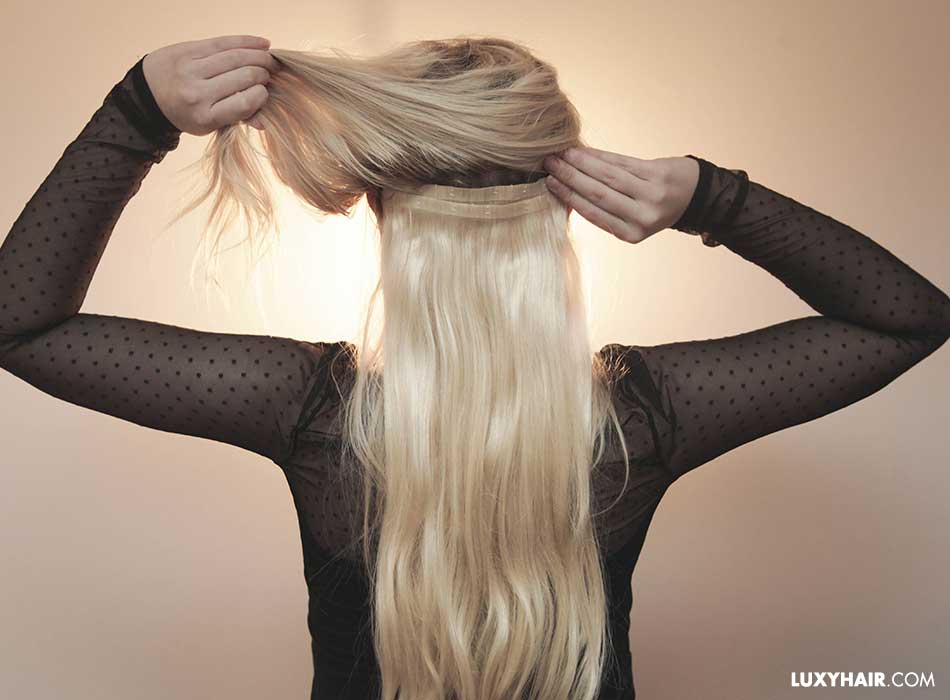
Take two 2-clip wefts, separate another section of hair just above your ear and clip each weft in at the left side and right side of your head. As you can see, the key here is to build as much volume on the back and sides of your head as possible.
Step 4
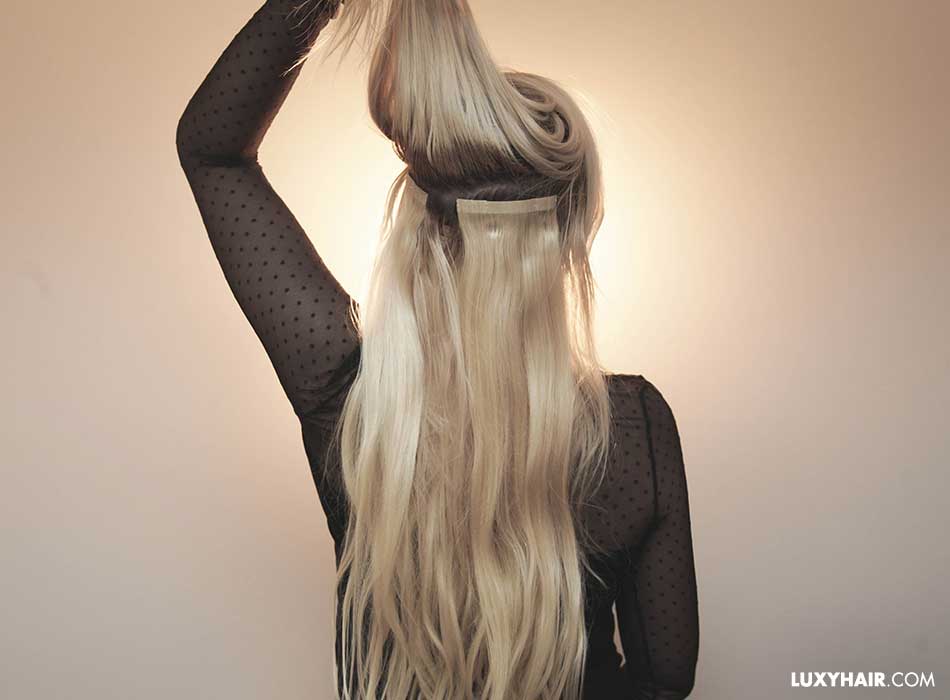
Now, take all your 1-clip wefts. Separate your hair at the crown of your head, and clip two 1-clip wefts in on the left side, and do the same on the right side.
Step 5
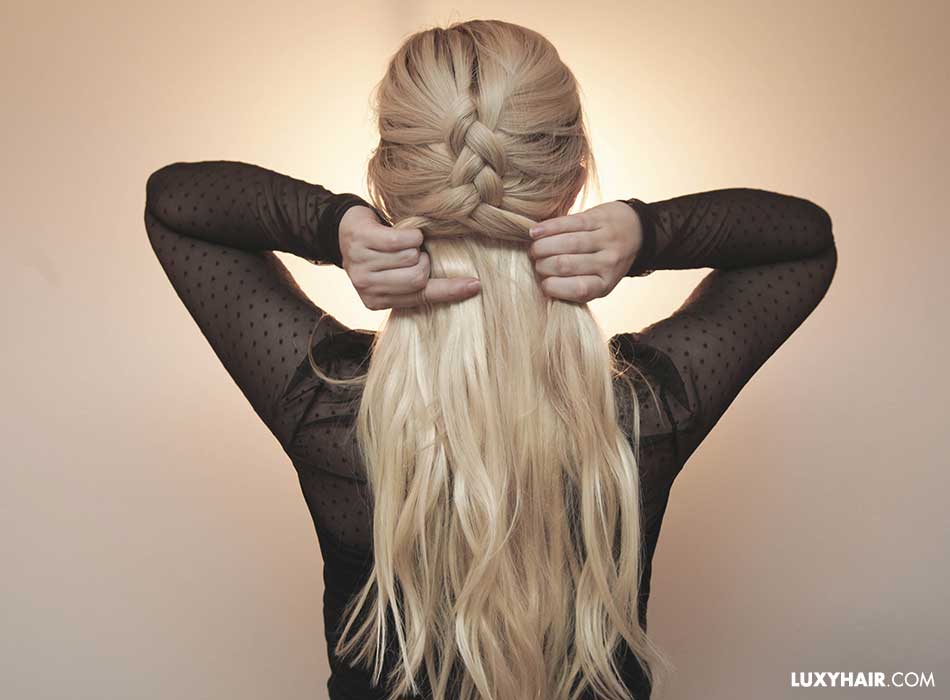
It’s time to start fishtail braiding! Separate your hair into two sections at the crown of your head. Take a small strand of hair from the right side of your head and cross it over to the left side. Then, take a small strand of hair from the left side of your head and cross it over to the right side.
Step 6
Continue this process down your head, adding in a bit of hair from each side every time. Once you’ve reached the nape of your neck, continue that pattern with the remaining hair all the way to the bottom and secure with an elastic.

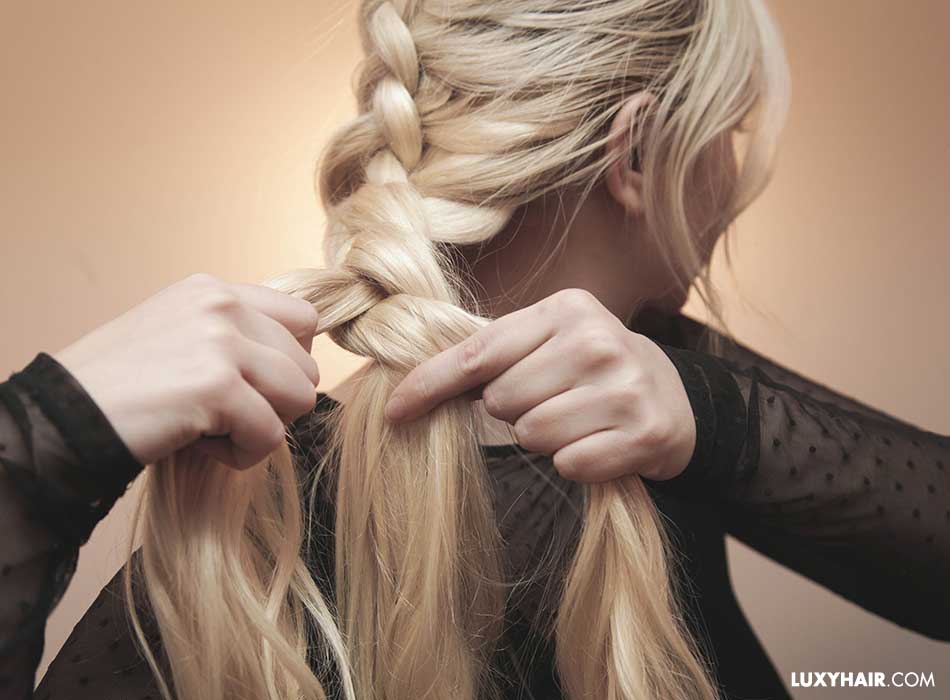
By simply adding hair to your braid in the form of hair extensions, you can see just how thick and long your braid can be! If you want to go one step further, gently pinch at the braid and pull it out slightly, which will give the braid the effect of being even thicker and more voluminous.
 @kassinka wears Seamless Platinum Blonde Luxy Hair extensions
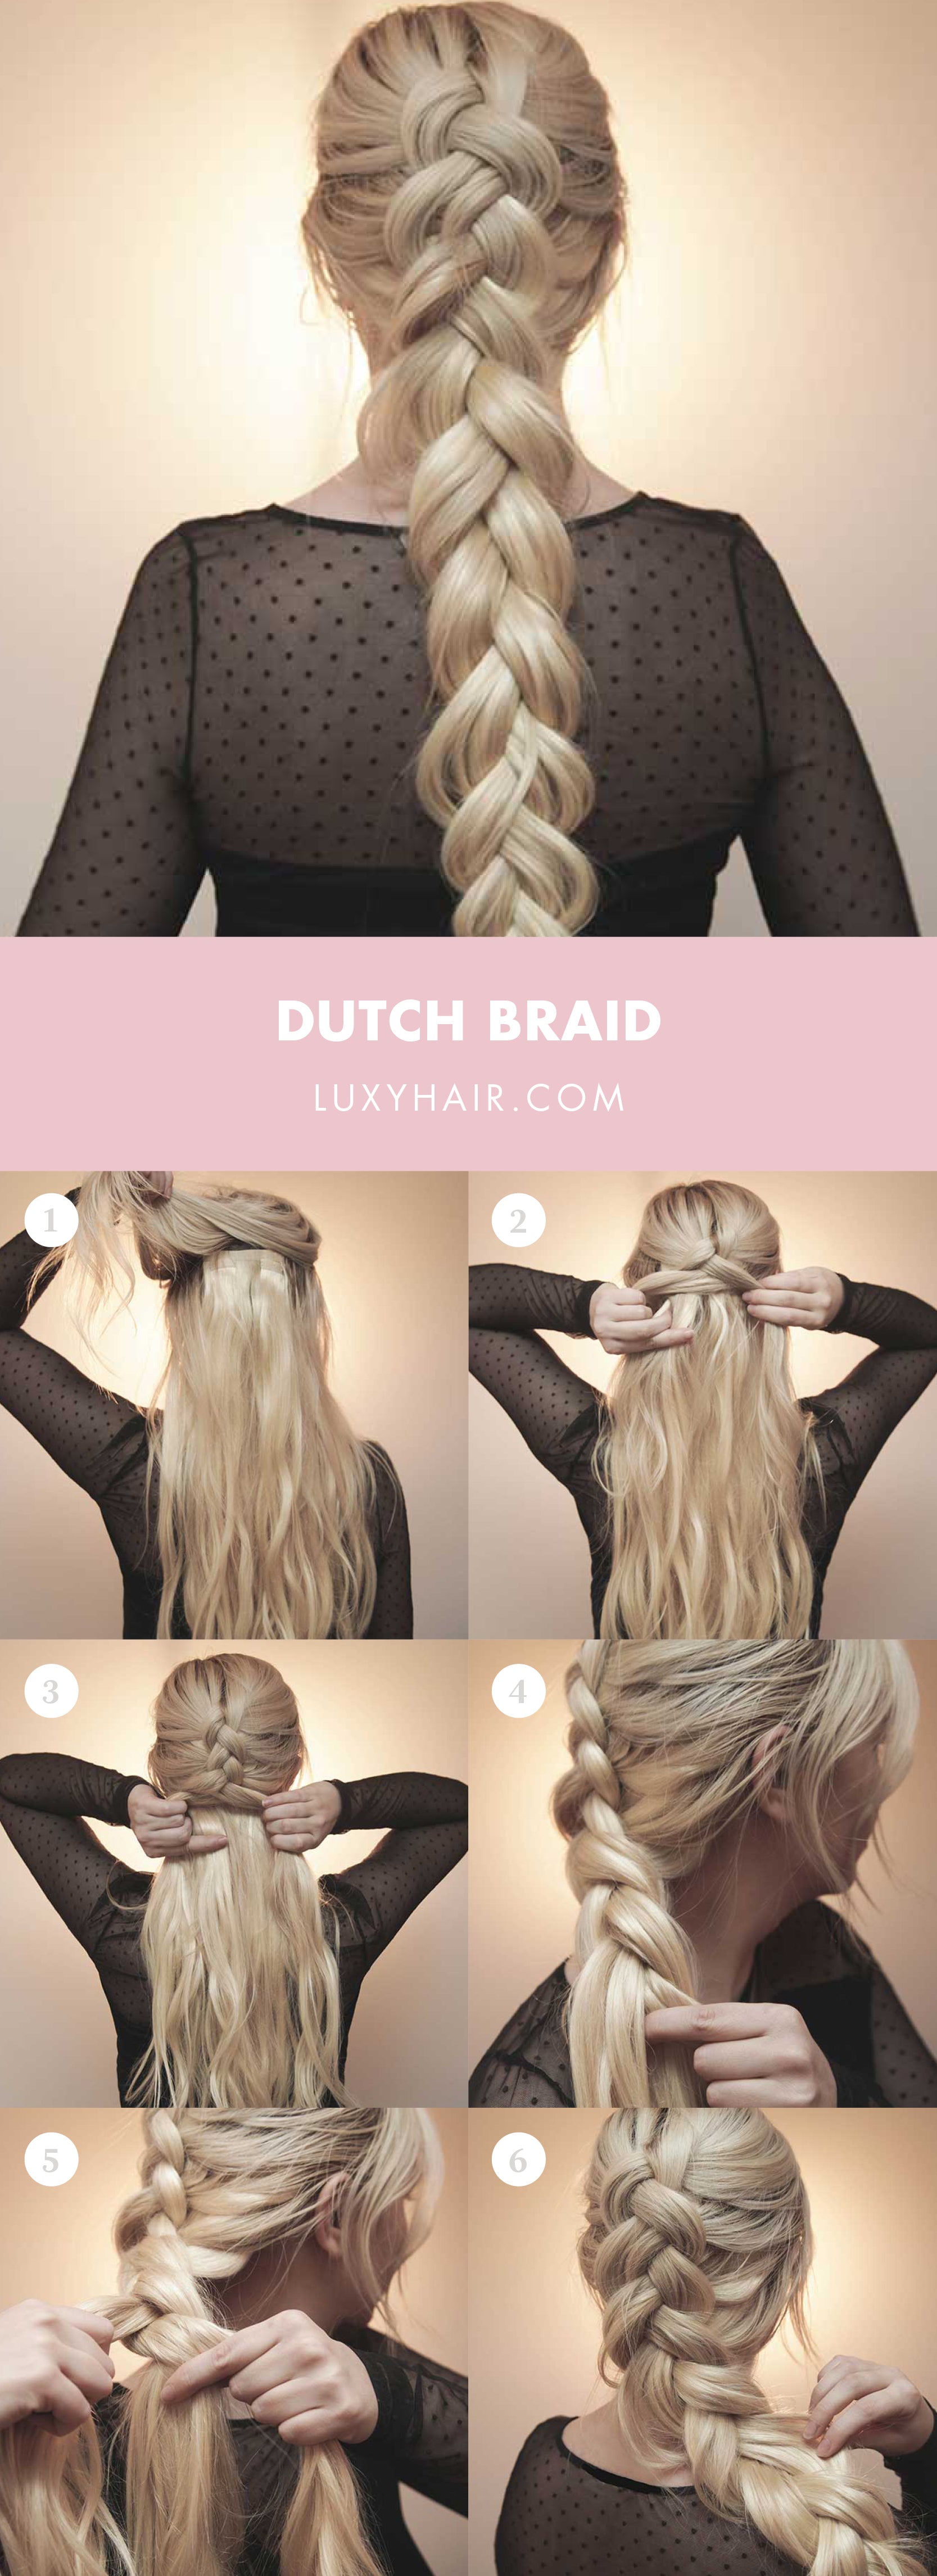
How to get a thicker Dutch braid
 @kassinka wears Seamless Platinum Blonde Luxy Hair extensions
Step 1
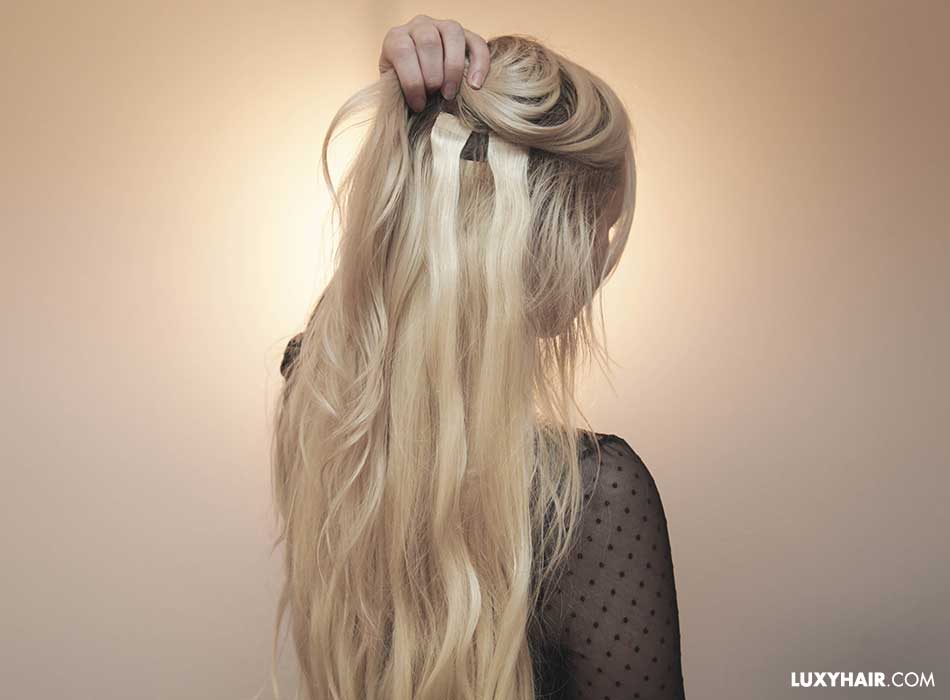
Now that you’ve clipped most of your wefts in, you will be rearranging some wefts slightly to accommodate the Dutch braid. Remove the 2-clip and 1-clip wefts you previously clipped in. Then, stack two 1-clip wefts on either side of the 2-clip weft.
Separate your hair just below the crown, and clip this weft in. The reason for this is because you want most of the thickness to be concentrated in the middle of your head for the Dutch braid, whereas a fishtail braid requires extra thickness on the sides.
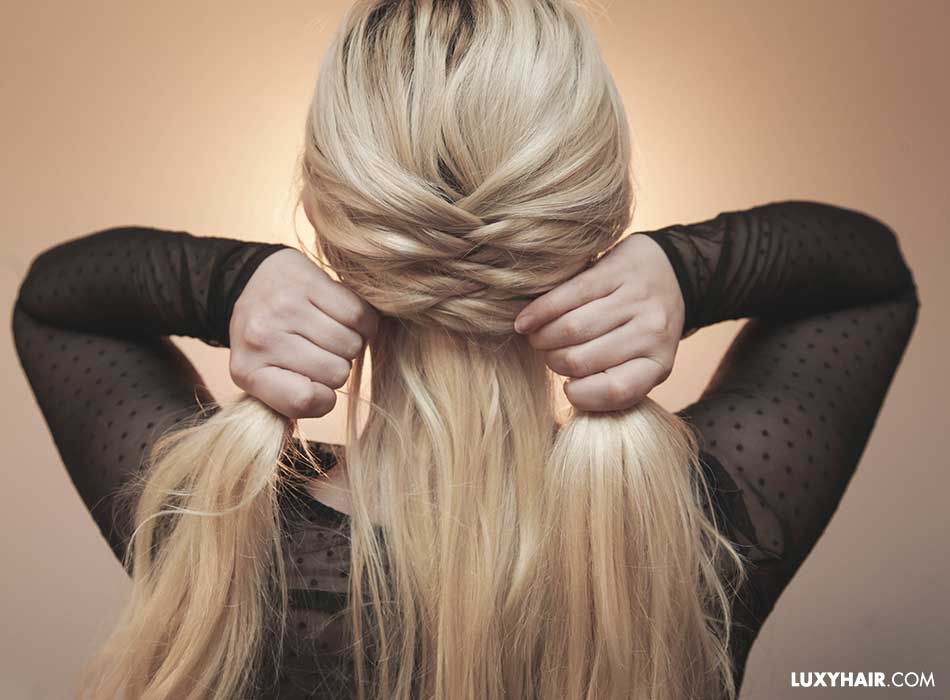
Step 2
Begin braiding. Gather a section of hair at the crown of your head and divide it into three. Take the middle section and cross it over the right section. Then, take the new middle section and cross it over the left section. Continue this pattern, each time adding more hair to the braid from the side. Be sure to keep pulling the braid taught to keep its shape.
Step 3
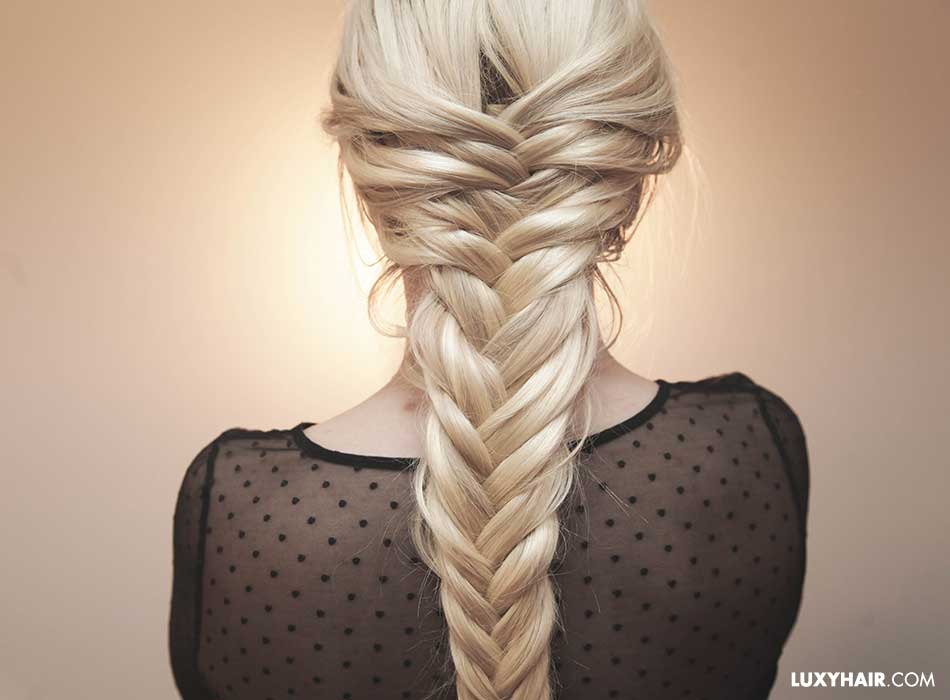
Once you reach the nape of your neck, 3-strand braid the rest of your hair until you reach the bottom and secure with an elastic.
Step 4
Pancake the braid by pinching on the hair and pulling at it slightly. This will also help hide any wefts that may be showing.
 @kassinka wears Seamless Platinum Blonde Luxy Hair extensions
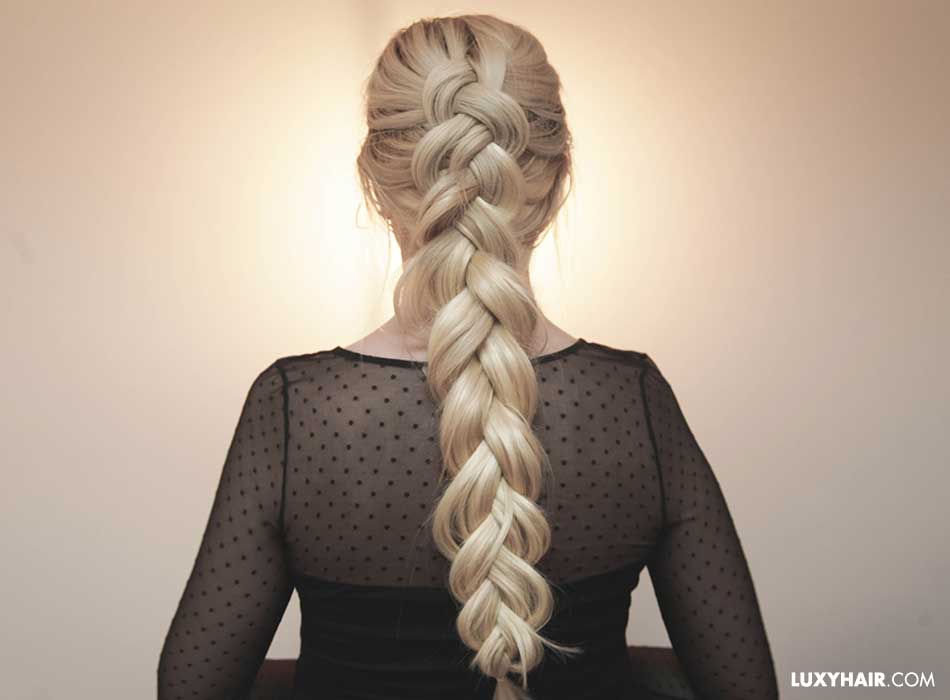
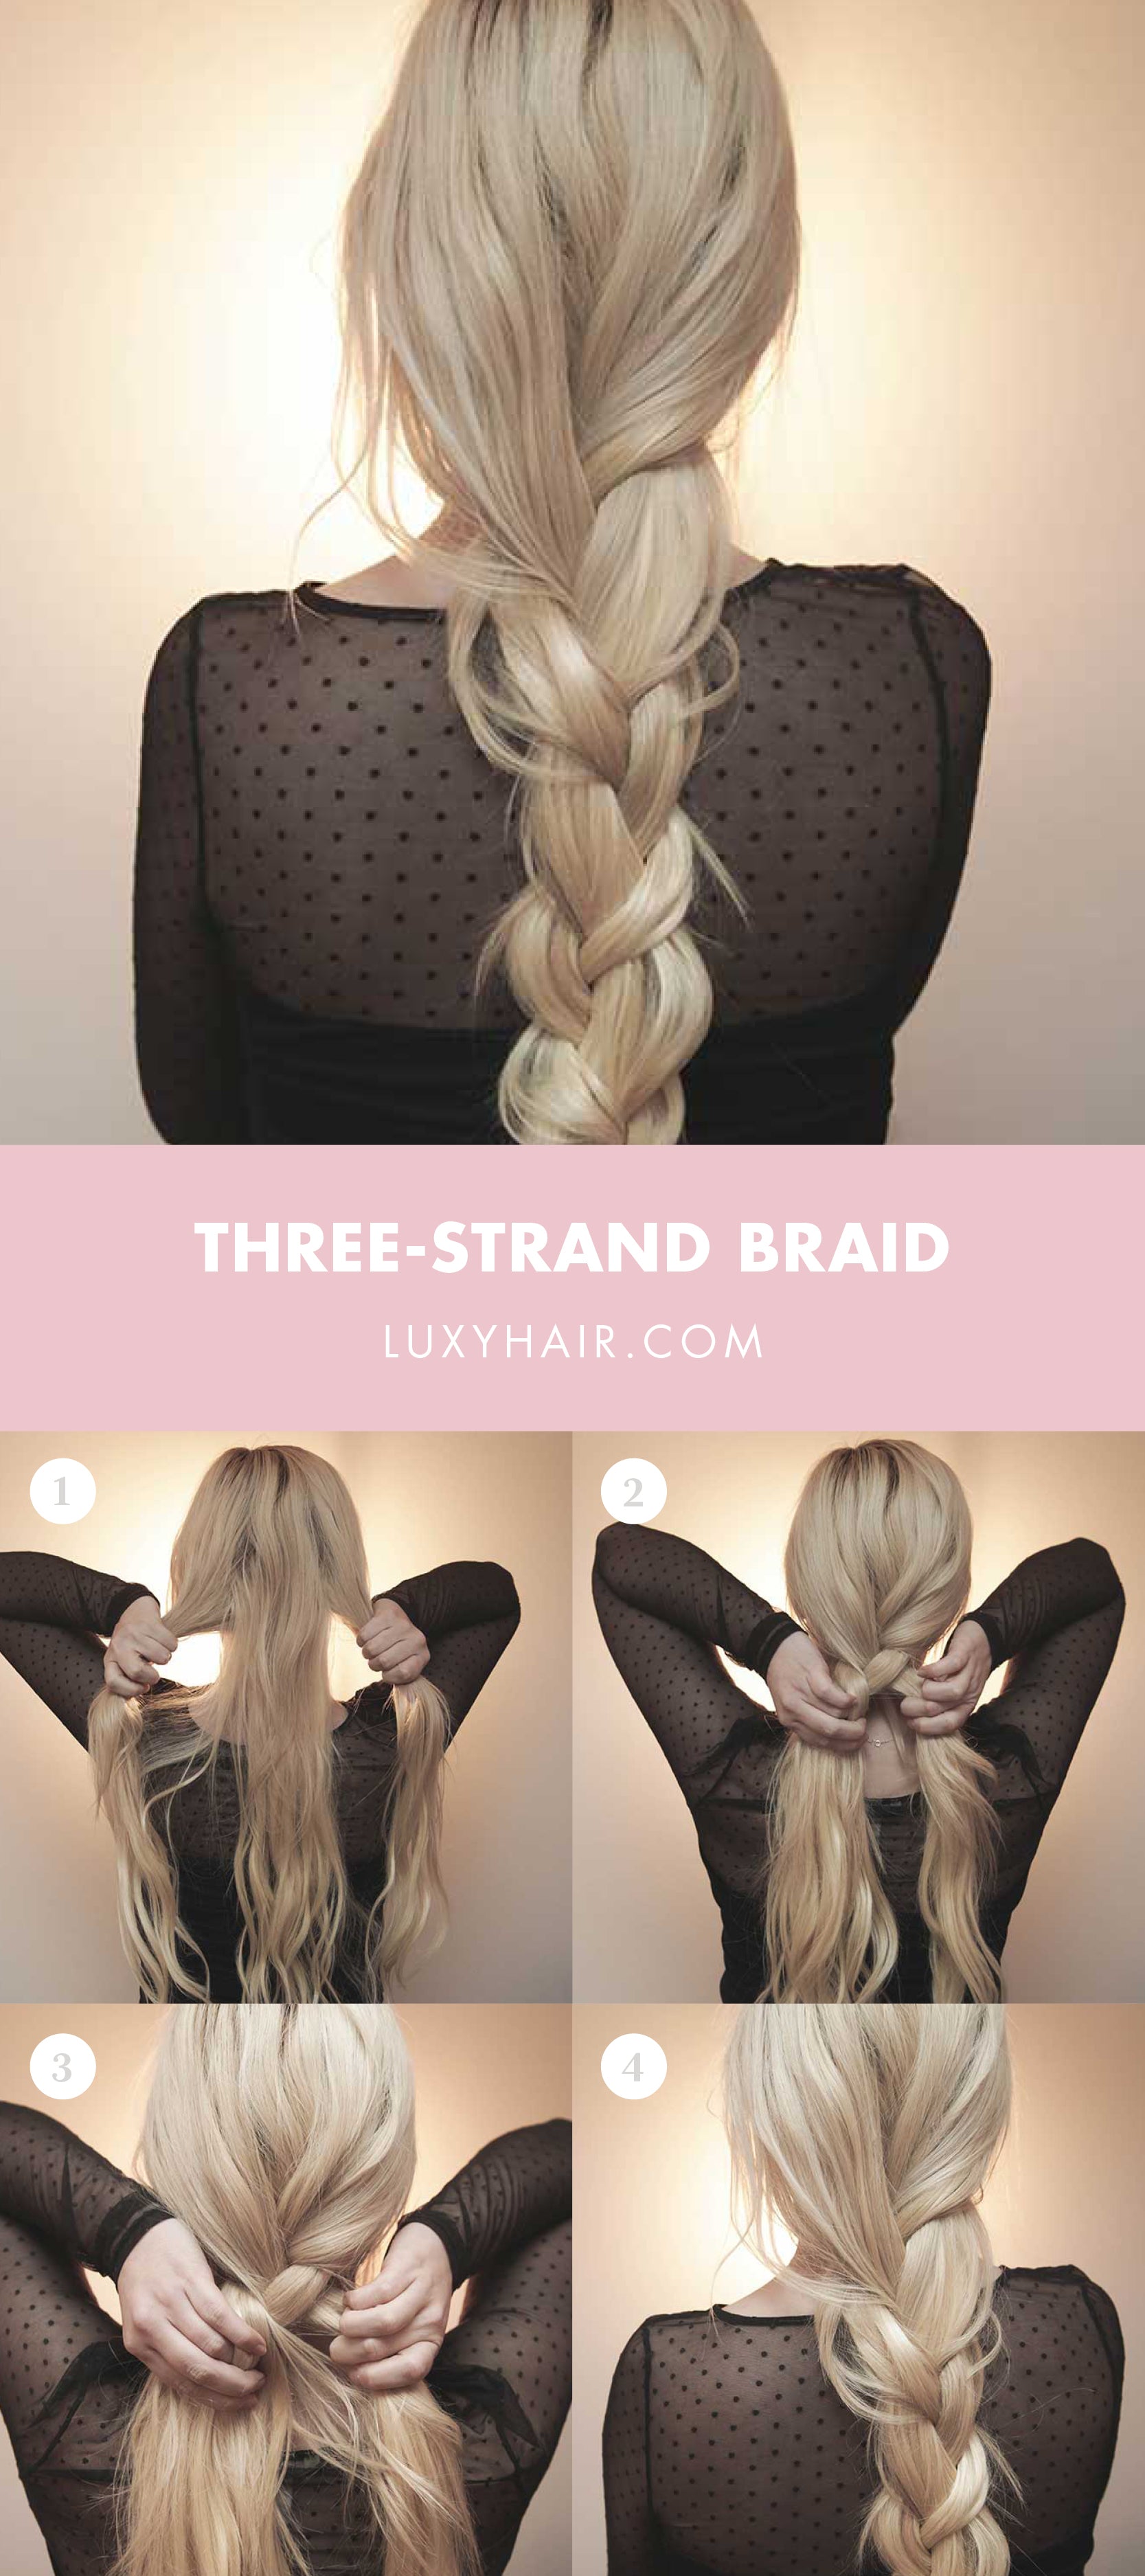
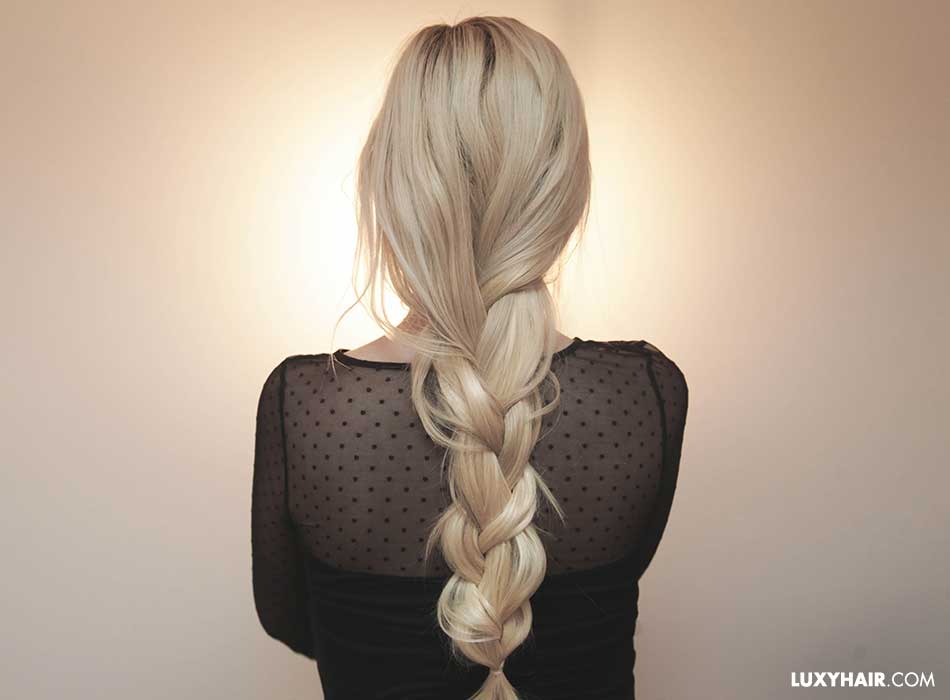
How to get a thicker 3-strand braid
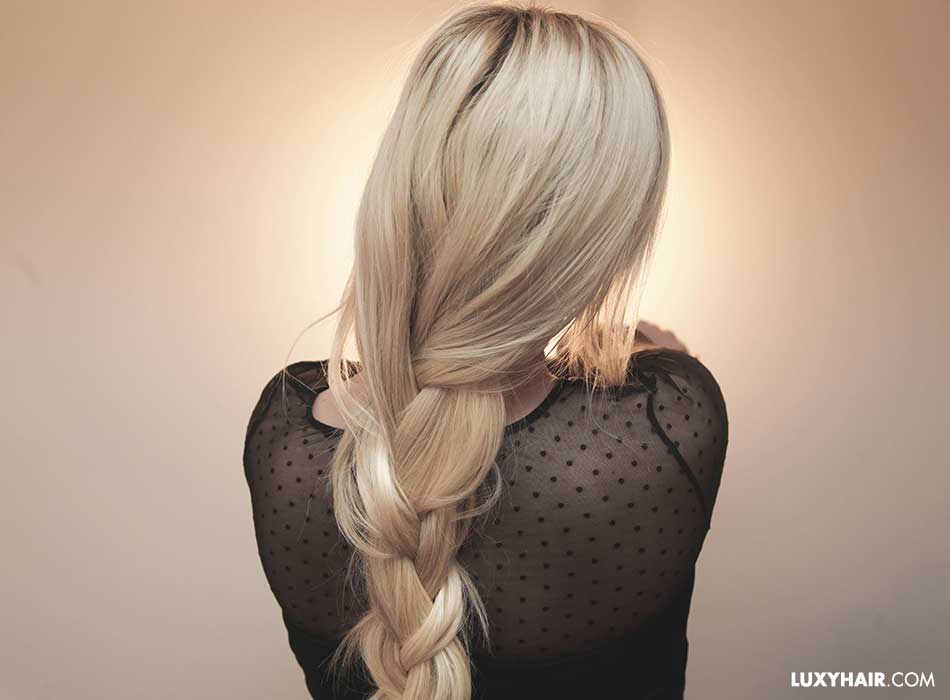 @kassinka wears Seamless Platinum Blonde Luxy Hair extensions
Now that you’ve mastered how to add hair to fishtail and Dutch braids, simply keep your wefts as they are and create a classic 3-strand braid. No weft rearranging required.
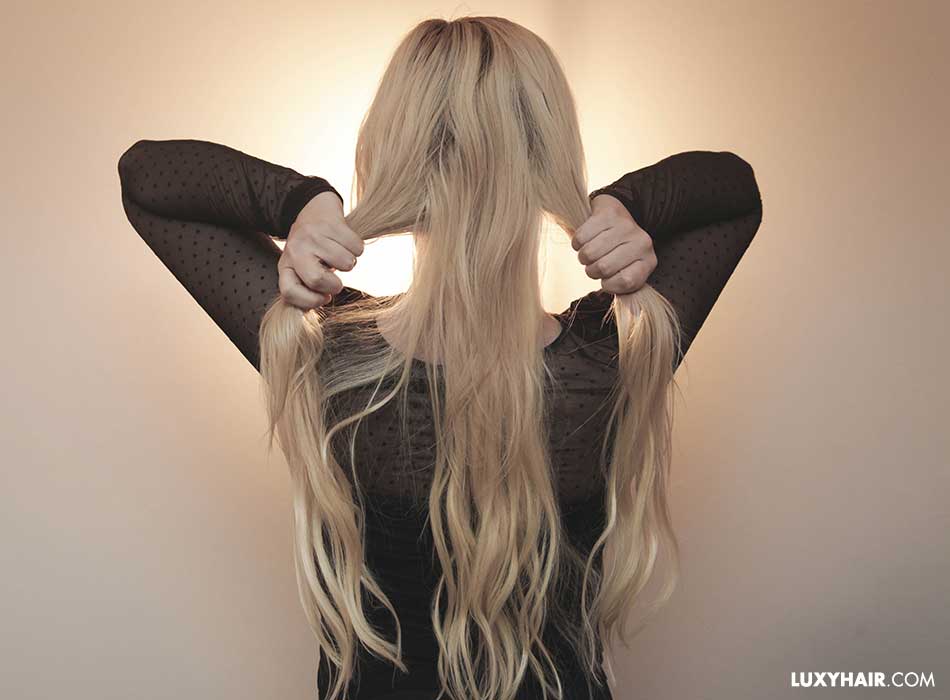
Step 1
Separate your hair into three equal strands
Step 2
Take the right section and cross it over the middle section
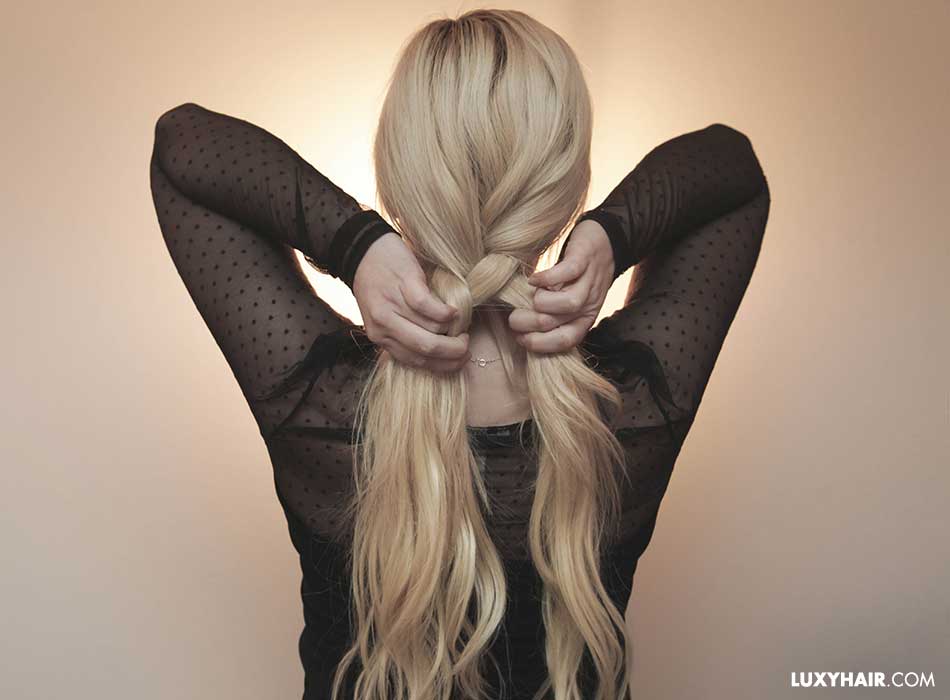
Step 3
Take the left section and cross it over the middle section
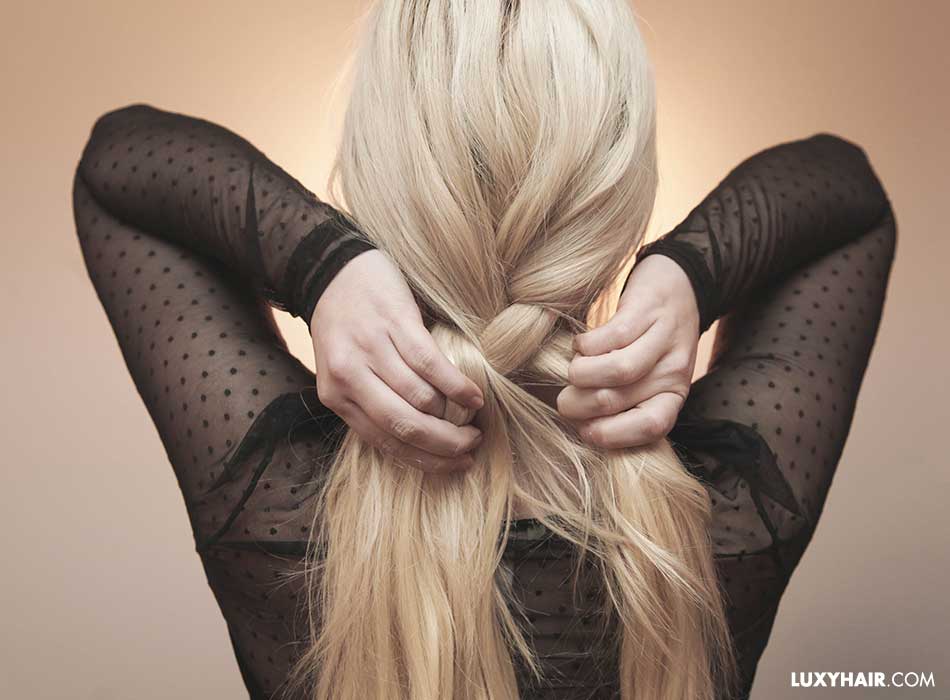
Step 4
Continue this pattern all the way down, and you're done!
 @kassinka wears Seamless Platinum Blonde Luxy Hair extensions
If you’re looking for an extra thick, mega voluminous braid, you can even clip in your entire set of Luxy Hair extensions, and loosely braid your hair. The possibilities are endless!
By simply adding hair to your braids with hair extensions, long, thick, Disney-princess level braids are within your reach! Simply strategically place each weft and add hair to sections where more thickness is needed, depending on the type of braid you are creating.