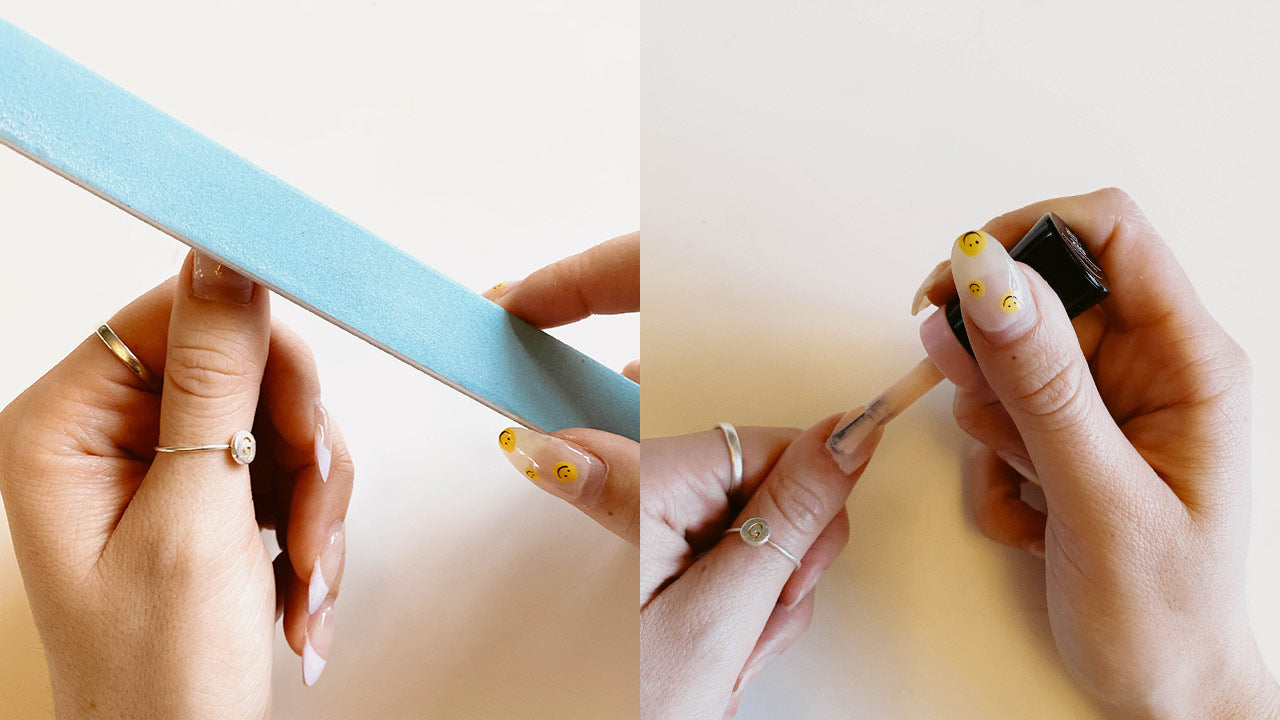
If there’s anything being stuck at home can teach us — whether it’s by choice or due to a pandemic — it’s that there are a lot of services we pay for that we can (to an extent) actually do ourselves. At home manicures are a perfect example of this.
Getting a manicure is the ultimate self care move. It is relaxing, indulgent, and is there anything better than the feeling of freshly done nails? That said, manicures can add up depending on the type of manicure you get, whether you opt for shellac, nail extensions, or plain polish.
We get it. Our nails are screaming for some TLC too. That’s why we reached out to nail technician Alyssa Allen at @nailditbyalyssa to break down everything you need to know to learn how to do a manicure at home. From removing shellac or gel nail polish at home, to shaping, buffing, and polishing, follow along for an easy, cost-effective at home manicure.

For a home manicure you will need:
Space
To do a manicure at home, you will need space to get the job done. The bathroom is the easiest place to do your nails but you can also lay out a towel and do your nails in front of Netflix. For more of a luxurious at home manicure experience, however, you can set up a nail station on a table to imitate what you’d see at a salon.
Time & Patience
First and foremost, for an at home manicure, you’ll need some time and patience. Once you can set your mind to it, block out a couple of hours to really commit.
Tools
Get all your tools together so that everything is in hands reach.
How to remove gel nails at home
Not many people know how to remove shellac at home—and no, peeling it off of your nails is not a safe solution. If you still have some remaining polish from your last shellac manicure, here’s how to remove your gel nails at home.
The tools:
- Nail File
- Buffer
- Foil
- Cotton Balls
- Cuticle Pusher
- Acetone
- Cuticle Oil
- Hand Lotion
Step 1: Buff Off the Top Coat

Use a nail file to buff off the top coat of polish. Because the top coat of a shellac manicure is so strong, it will need to be buffed down in order for the acetone to penetrate far enough to fully soak off the polish. Without buffing, you may be at this for a while.
Step 2: Apply Acetone & Wrap with Tin Foil

Rip a piece of foil into squares that will fit tightly around your finger. Apply a cotton ball with acetone to each nail, then use the pieces of foil to secure them by wrapping them around your finger. You can use any foil for this, including regular kitchen foil.
Step 3: Let Your Nails Soak

After you have secured the tinfoil around the cotton pads on your nails, let that sit for 10-15 minutes! (A.k.a Netflix & Nails)
Step 4: Scrape off Your Nails With A Cuticle Pusher

Now that your polish has been soaking, it’s time to use a cuticle pusher or an orange wood stick to carefully and gently scrape off the gel polish. Be careful to not dig into your nail plate as this can damage your nails. If the polish doesn’t fully come off, don’t fret. Just put your finger wraps back on and soak again for a bit longer!
Step 5: Lightly Buff
Once you’ve got most of the gel polish removed, take a buffer and lightly buff the rough bits of remaining base coat to smooth everything out.
Step 6: Finish With Cuticle Oil and Hand Lotion

For that salon-like experience, finish up with some cuticle oil and hand lotion to moisturize your nails and hands, and leave them feeling clean and fresh.
How to do an at home manicure
Now that your nails are fresh and clean from your previous manicure, it’s time to glow them up.
The Tools:
- Nail File
- Nail Clippers (if needed)
- Nail Polish Remover/Acetone
- Buffer
- Cuticle Pusher
- Cuticle Oil
- Hand Lotion
- Cotton Pads
- Base Coat
- Coloured Polish
- Top Coat
Step 1: Clip Your Nails

If your nails are too long for your liking, clip your nails to shorten them and give them more of a desired shape. This is also when you'll be able to remove hangnails and clean any remaining build up underneath your nails.
Step 2: Buff Your Nails

Use a nail buffer to slightly buff the nail and smooth any small imperfections. This will create a more smooth canvas to apply your nail polish and will prevent a bumpy texture underneath.
Step 3: Gently Push Back Your Cuticles

Gently push back your cuticles using a cuticle pusher or an orange wood stick. Avoid trimming your cuticles, as that’s a task to leave to the professional nail techs.
Step 4: Apply Your Cuticle Oil
Apply your cuticle oil by massaging it into your cuticles and fingers. This is also a good time to moisturize your hands with a lotion. After all, with all the hand washing we’ve been doing and hand sanitizer we’ve been using, our hands are pretty dry right now.
Step 5: Remove the Oils with a Cotton Pad

Use a cotton pad with some acetone on it to remove any remaining oils around your nail bed (not your nail). If you have a lint-free cotton pad, that’s even better. Make sure to avoid removing the oils on the nail, because the oils will help the nail polish to stick and not chip. Other than your nail beds, keep everything else oiled up!
Step 6: Open Your Polish Bottles
Open all of your bottles leaving the lids loosely on top to make sure you can open the bottles later. After all, once your nails are wet, you will want to avoid smudging them by trying to open a sticky bottle.
Step 7: Apply Your Base Coat
Now is the time to apply your base coat to create a glossy canvas for your nail polish. If you’re not into painting your nails, you can just apply two coats of nail strengthener or hardener and call it a day.
Step 8: Apply Your Colour

Now is the time to get painting! First, prepare your polish by rolling the polish bottle between your hands. Avoid shaking the bottle, as shaking causes bubbles—and that’s no bueno. Once your polish is ready, start by applying two thin coats of your colour of choice. Let each coat semi-dry in between to avoid globs and mess.
Step 9. Apply a Glossy Top Coat
To provide that glossy finish and protect your polish, top up your nails with a top coat.
Step 10: Clean Up
Use a Q-tip with acetone to tidy up any stray nail polish on your skin.
Step 11. Dry Those Nails
Now is for the easy part—let those babies dry. Even though your nails may start to dry on top first, give them a solid hour before you really start using your hands.
Tip from our nail tech Alyssa:
“Do one full hand at a time if you’re worried about smudging while using your non dominant hand. Just be sure to give each layer a fair chance to dry in between coats! Thin layers are better than one thick gloopy one!*
Other DIY At Home Ways to Pamper Yourself:
DIY Hair Masks
If you are as dedicated to hair as we are, try out some DIY hair masks. We’ve put together a list of nourishing DIY hair masks that you can use on your locks or hair extensions, or both.
Oil Scrubs
Staying indoors may cause your skin to dry out depending on your indoor air circulation and ventilation. Fortunately, you can always try some DIY oil scrubs to moisturize your skin and leave it feeling soft and nourished.
Biotin Shake
If you don’t think shakes and smoothies are a form of self care, it’s time to try making some extra nourishing morning drinks. Biotin shakes are delicious, full of nutrients, and even stimulate hair growth! Try out our DIY biotin shake recipe today.
DIY Scalp Scrub
Scrub’s aren’t only for moisturizing your skin -- they are for moisturizing your scalp too! Kick back, relax, and pamper your scalp with our DIY scalp recipe that you probably already have the ingredients for!
Written by: Brittany Rodriguez


