Summer is finally here and we are feeling very bohemian. In this week's hair tutorial I show you how to create this very summer appropriate braided half-do. It's the perfect hairstyle for music festivals, weddings and any kind of outdoor parties. It photographs really well... *wink, wink* , so we promise that you and your hair will be the life of the party.
Mimi: Hello my beautiful friends, it's Mimi here today and ...
Zane: Zane.
Mimi: And today we're going to show you this really awesome hairstyle that I think will be perfect for a music festival, summer party, any kind of celebration and festival. I'm going to call it, I don't know, what do you think we should call it?
Zane: Bohemian.
Mimi: Bohemian, yeah, like a braided Bohemian hairstyle. It's a half up, half down. I'm not going to lie, it's a bit complicated, and that's why I have Zane here today. So I'll be showing you the hairstyle on her and not myself, because that would just be very crazy. It is possible to do it on yourself. However, if you can find somebody to help you, you'll save yourself a lot of unnecessary stress. So let's get started.
Zane: Let's do it. I'm excited.
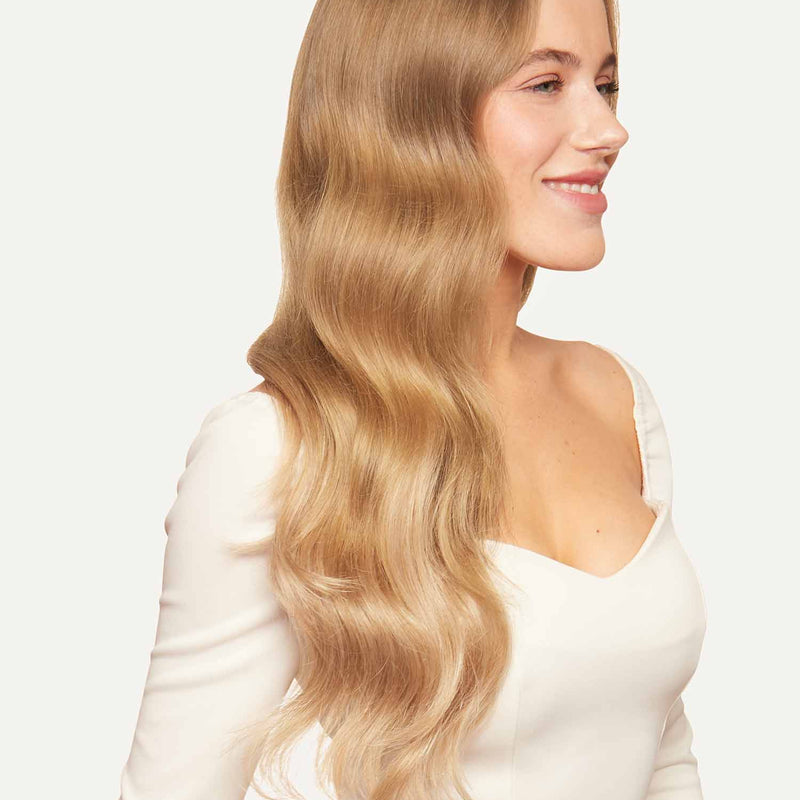
Mimi: Let's go. All right, so I'm going to start as always by brushing Zane's hair, and then I'm going to start curling it. Zane is wearing the 220 gram set in dirty blonde. As you can see, there's a lot of hair to work with. So I'm just going to speed up the curling process. Once I brushed the hair, I'll just show you what I'm using to curl her hair. I'm just going to be using really big chunks over here, so I'll just separate whatever I'm not curling away. And then I'll grab a section of hair, just like that. And this was already hot. What I'm going to do is just place the iron on top of the hair, and then just curl it around the barrel. And this new thing that I do now when I curl, is I don't just hold the barrel in one spot, I let it slide a little bit. And then I'll hold it for a few seconds, maybe something like 10. And then when you release it, you have a really nice soft wave, just like that.
Zane: It's pretty.
Mimi: All right, so I'm going to continue curling Zane's hair, and I'm going to speed it up so that you guys can see what I have when I'm finished.
Mimi: All right, so it took me about 15, 20 minutes to curl all of Zane's hair. And as you can see, the sliding, curling iron and action that I was doing while curling the hair, creates curls that are just a bit more loose and effortless, and just softer I would say. So what I'm going to do next, I'm actually not even going to even hairspray it. I want to hear to relax more and look more natural. I'm just going to run my fingers through the hair, just to loosen it up even more. Just gonna brush it out like that. And as you can see, it looks super beautiful and feminine, and romantic. And the next thing I'm going to do, is I'm going to start creating this really cool braid on the back of Zane's hair.
Mimi: Okay. The first thing I'm going to do is create a regular three strand braid. I'm going to go to Zane's head, and I'm going to grab a section that's going more from the left. As you can see, sometimes we can see some wefts, because she's wearing Lexis. But once I'm going to pin the hair, you won't see anything that's underneath. I'm just going to grab this section and do a regular three strand braid, all the way down. Once I reach the bottom of the braid, I'm just going to secure it with a clear hair elastic.
Mimi: Then I'm going to go to this braid, and I'm going to do the same thing I showed you guys in my previous hair tutorial on double braid. So I'm going to go into the right section of this braid, and I'm going to create hooks. So all I'm doing is just pulling on each strand of the braid, just like that. And I'm creating a hook, an opening that I can then use to braid in the other braid. And you'll see what I mean in a moment. But first I'm just going to create this hooks, all the way from top to bottom of the braid.
Mimi: Now the next step is, I'm going to grab a section that's right next to my braid, to the right of the braid. And I'm going to create a second three strand braid. However, as I'm going to be creating this three strand braid, I will be braiding it through those hooks, or the loops that I created in the first braid. So for example, here, as you can see, I'm just using that opening to pull the first section of the braid through the loop, just like that. Which connects the two braids together. And then I'm just going to do a regular three strand braid down. And then as I have that one section again, I'm going to do the same thing. I'm going to bring it through the loop of the first braid, and continue braiding this regular three strand braid in this matter.
Mimi: Okay, now I'm just going to secure the second braid and the first braid together. And as you can see, I have two braids intertwine. So now I'm just going to go back into these two braids, and I'm going to pull them out. So I'm just going to go into sections of these braids, and grab on them, and just carefully pull the hair out. And this creates an effect over woven braid, which it actually is. As you can see, it's super pretty, especially if you have highlights in your hair, or if you're wearing lighter hair extensions like Zane is, you can just see the highlights so much more.
Mimi: Now the next step will require you a lot, and a lot of bobby pins. So what the next step is, placing this braid sideways, so to the right, and then starting to pin it in place. And I have some bobby pins here, so we're first going to place it sideways like that, and start pinning it. We'll start from the bottom up, just like that. And then from the top to bottom, just sliding bobby pins in the hair. And then we're going to take the end, and we're going to go this way, just going to go backwards. So first is going to go to the right, and then to the left, and then we're going to hide the tail inside of this. And as you're doing this, if you see any sections that you want to pull out or fix, you can just go ahead and do that.
Mimi: Now I can see the tail came out through the bottom, and I'm just going to hide it back with the bobby pin. So I'll just slide it under, and pin it up. Now the last step is going to be actually creating a French braid from the right side, because we only have this in the middle of the head, and you have some hair here from the left, which looks nice. But from the right we've got to create a really small French braid. I'm going to start with just creating a regular three strand braid first. And as I'm going to be braiding it, I'm pulling it back, because I'm going to pin it in the back. So first the three strand braid, and then I'm going to add a section of hair to the right section, only to the right section. Just going to grab a small chunk of hair and add it to the right, incorporate that in, and then braid it into the hair. And then as I go down, I'm going to continue adding small chunks of hair, only to the right section.
Mimi: And at this point I'm going to stop, I'm going to go back into the braid and I'm just going to pull on these sections that I French braided. And then I'm just going to pin it under. And as you can see, I placed that braid over the weft, so it hides the weft and you can no longer see it. And here I'm just going to place a few more bobby pins to secure this braid in place. All right, so now that I fixed and pinned everything in place, the hairstyle is finished, and this is what it looks like.
Mimi: And that's it for today my beautiful friends, this is what the finished hair style looks like. It's absolutely beautiful. Zane, what do you think?
Zane: I love it. It's so pretty. I love the curls, they're so full as well. And I just-
Mimi: And the highlights. Your hair looks so much [crosstalk 00:08:54].
Zane: So many shades. But I love it. It's beautiful.
Mimi: Awesome. How was the whole experience of me braiding the hair in the back?
Zane: It was fun, we should do it more often.
Mimi: So we're just having fun on Instagram the whole time. [crosstalk 00:09:05]. All right guys. Let us know how you like this hairstyle down below. Leave us a comment, like this video. It will make my day and Zane's day.
Zane: My day as well.
Mimi: And then when you recreate this beautiful Bohemian hairstyle, make sure to post it on your Instagram with hashtag Luxyhair. Love you guys. Bye.
Zane: Bye.
For this hair tutorial, Zane has added Dirty Blonde Luxies in 220 grams. I'm amazed at how well it blends with her hair an how natural it all looks.
Give this hairstyle a try and let us know how it works. Also, remember to tag us in your recreation photos on Instagram with #Luxyhair. We always feature our favorites on our Instagram.