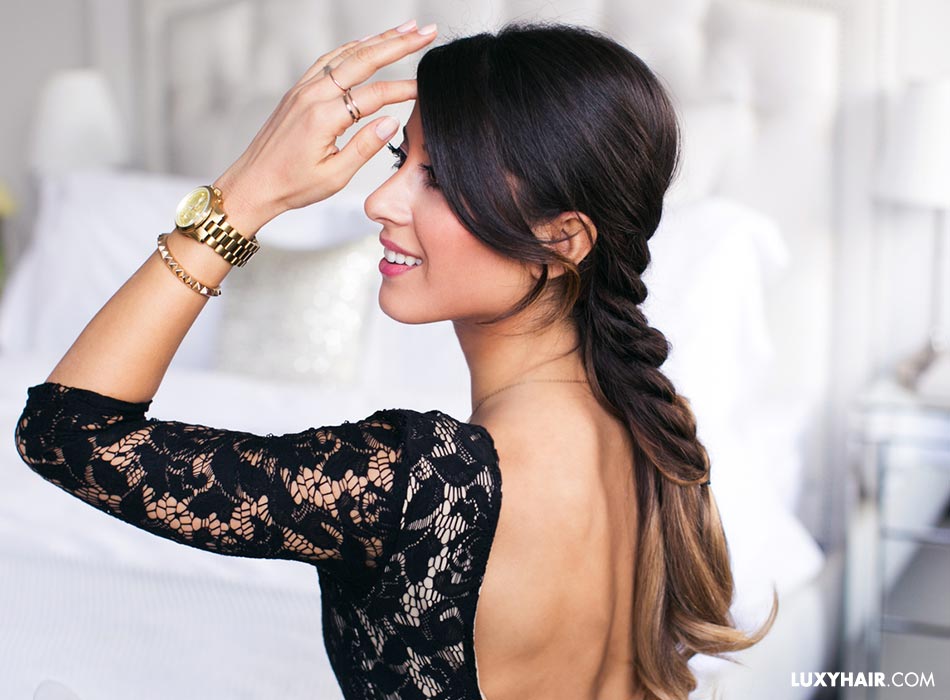
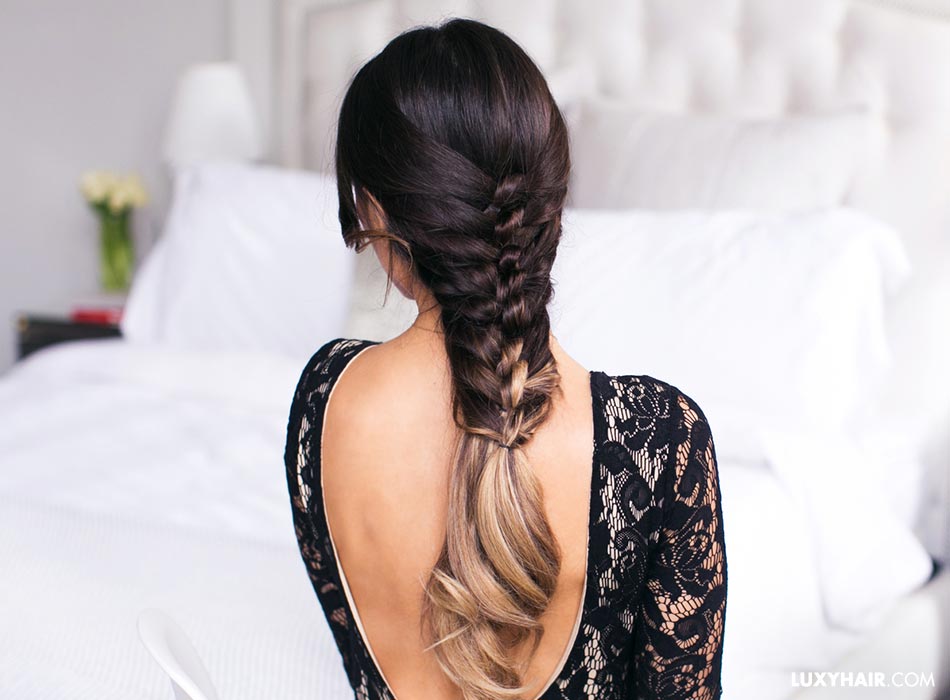
Learning to braid, like riding a bicycle, takes a bit of time and patience, but one of you've gotten the hang of it, you never really forget. Like riding a bike with training wheels, you likely learned the easiest and most classic 3-strand braid as a child, braiding your friends' hair at sleepovers or at school. As the training wheels came off, you may have also conquered the more complicated fishtail braid or French braid. And if you've already added the waterfall braid or Dutch braid to your braid hairstyle repertoire, you're well on your way to becoming a master. But have you heard of a side Dutch French braid? How about a spiral braid or faux knot braid?
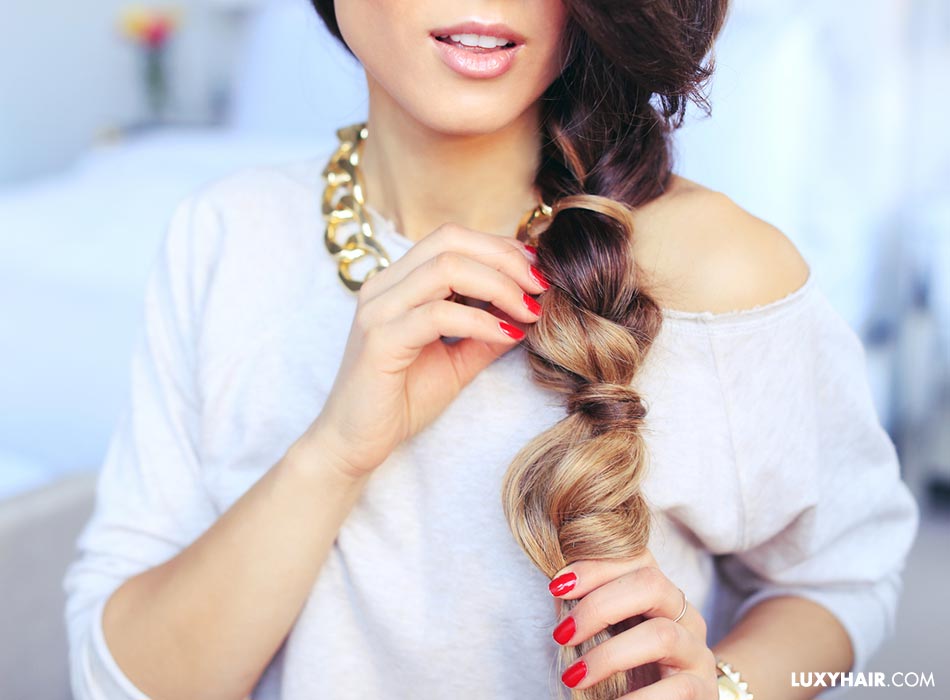
As self-confessed braid lovers, we're here to show you how to take your basic braiding skills to the next level with 10 advanced braids to step up your braid game. When creating more complicated braids, is it important to keep the braids thick and fluffy, so we love using clip in hair extensions for these braids. By strategically clipping in wefts, you can take your braids from drab to fab and thin to thick.
Advanced braid hairstyle 1: Braided Ponytail
Let's start off with a straightforward braid style that still looks very elevated and chic. If you have short hair or would like to add more fullness to your hair, you can use either our straight ponytail extension or curly ponytail to create this look.
Step 1
Put your hair in a ponytail and then clip in your ponytail hair extensions to make your braided ponytail look like the star of the show. Secure with a few bobby pins.
Step 2
With your ponytail extension secure, do a 3 strand braid and then tie the end with an elastic.
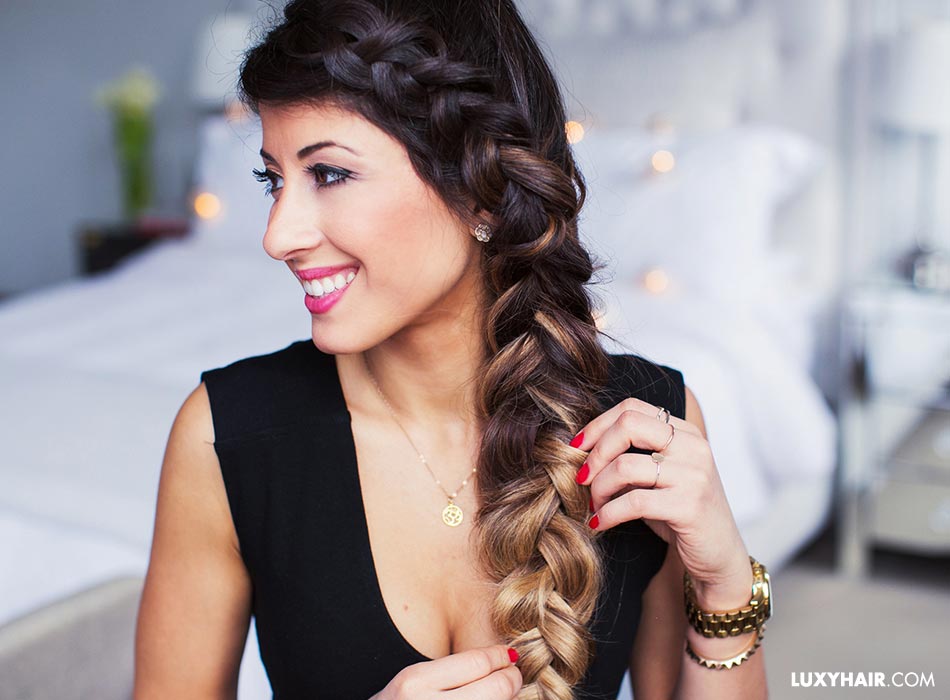
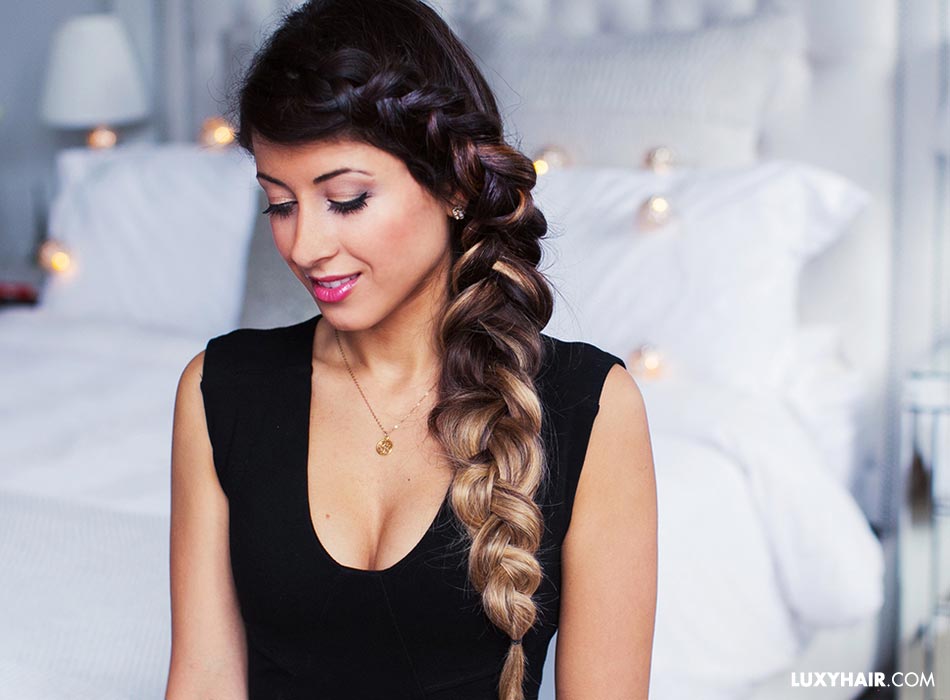
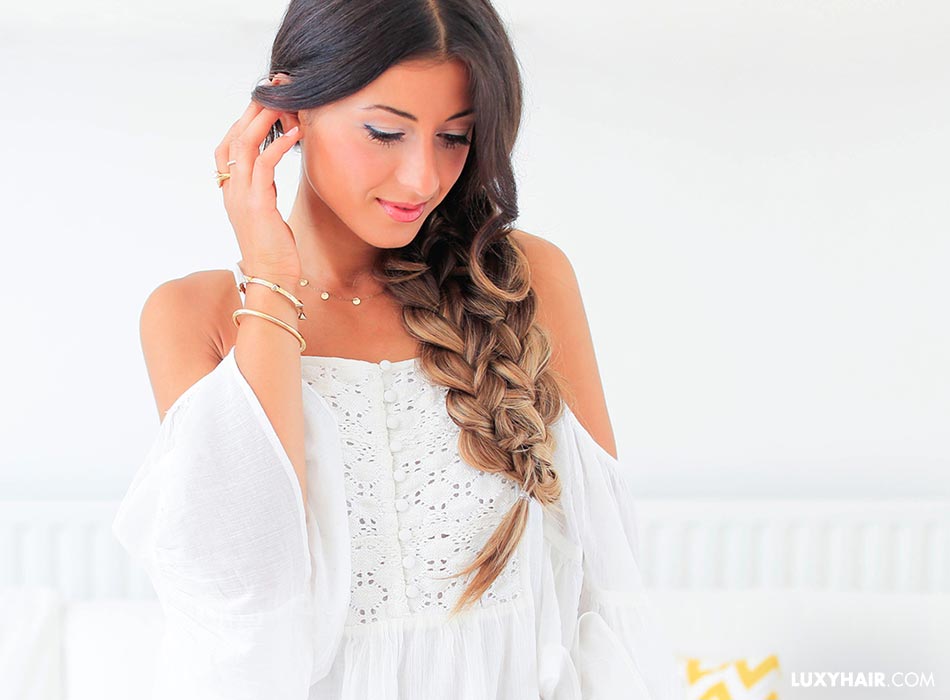
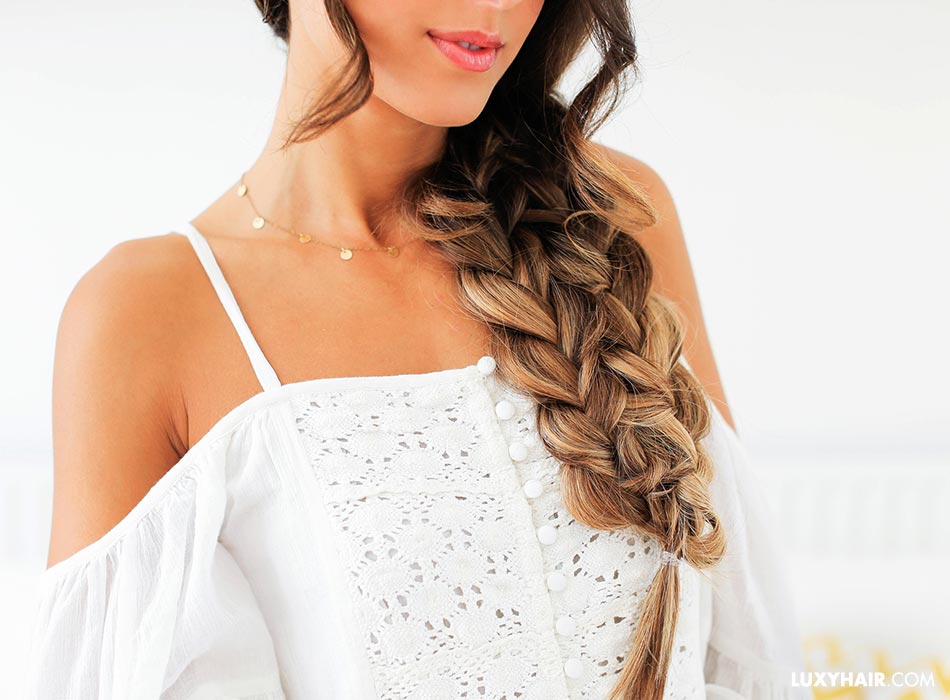
Advanced braid hairstyle 2: side Dutch French braid
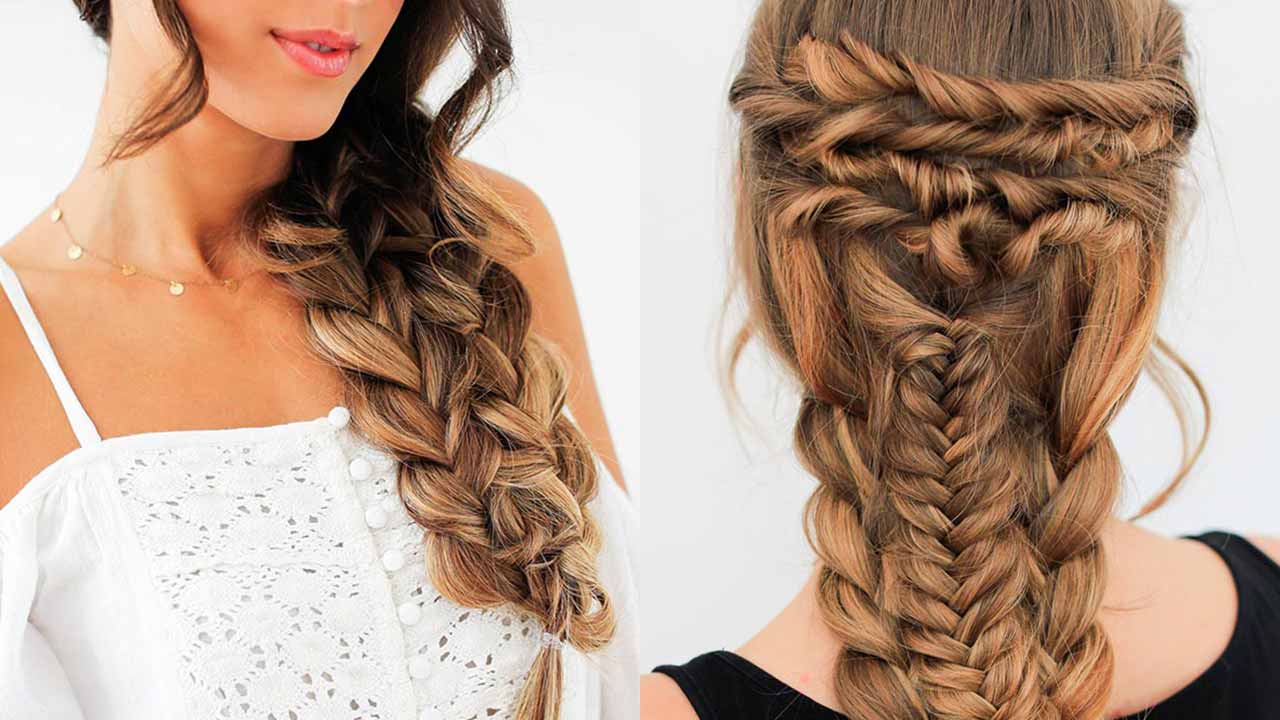
This trendy Side Dutch French Braid tutorial combines a French braid and Dutch braid, bringing it to the side for one cool result. If you're an Instagram or Pinterest fanatic, you've likely seen variations of this braid floating around. In this tutorial, Mimi uses her 160g Ombre Blonde Luxy Hair extensions to add thickness and volume to the braid.
Step 1
Clip in your hair extensions—this is what will give you that mega volume in your braid.
Step 2
Decide which side you want your braid on, then part your hair on the other side and bring all your hair over. For this tutorial, we will be braiding on the left side, so created a side part on the right side of your head and bring all your hair over to the left side.
Step 3
You are going to start by creating a 3-strand Dutch braid at the front of your head, so take a big section of hair, leaving a 1 inch section out, and split it into three sections. Then, take the middle strand and cross it over the left strand, then take the new middle strand and cross it over the right strand.
Step 4
To turn this into a French Dutch braid, take the section of hair you left out at the front of your face and add it to the left strand. Then, take another section of hair on the other side of your head and add it to the right strand, before continuing to braid. Be sure to braid back, rather than down.
Step 5
Continue adding sections of hair to each side from the front and back, crossing the middle strand over the side strands.
Step 6
Once you reach your neck and there is no more hair to add to the braid from the sides, continue the braid like a normal
https://www.luxyhair.com/blogs/hair-blog/how-to-braid-tutorial-for-beginners all the way until the end.
Step 7
Now the fun part! Go through the braid and gently pull out the hair from the inside of the braid to make it thicker and fluffier. Be sure not to pull too much, otherwise you may have layers and pieces of hair fall out.
Step 8
Bobby pin any shorter hairs in the back that may have come undone, and you're done!
Advanced braid hairstyle 3: faux knot braid
This faux knot braid is the ultimate go to hairstyle, when you don't know what else to do with your hair. Even though it looks very intricate, it's super simple to create on yourself. Whether you have short or long hair, straight or curly hair, the faux knot braid will look great on you. The fun part about this hairstyle is that you can create only one knot for a half up half down hairstyle, or many knots for a "braid" effect. Mimi uses her 160g Ombre Blonde Luxy Hair extensions in this tutorial for added volume and length in her braid.
Step 1
Clip your hair extensions in—you don't need to fully blend the extensions in, as you will be braiding all the hair. Then, brush your hair out to remove any tangles.
Step 2
Grab a 1-2 inch section of hair from the front of your head toward the back, and tie it into a knot. Then, take a small hair elastic and secure the knot in place.
Step 3
Take another section of hair from the right and left, just below the first sections, bring them to the back, and tie into a knot. Secure the knot in place again with another hair elastic.
Step 4
Continue this process all the way down, if you want to create a full braid, or only half way down for a half-up hairstyle. It's your choice!
Advanced braid hairstyle 4: bubble braid
This braided bubble hairstyle is one of our favourites! It's a cute and effortless hairstyle that works either as a ponytail (Princess Jasmine vibes, anyone?) or as a braid alternative. For length and thickness in the braid, Mimi uses her 160g Ombre Blonde Luxy Hair extensions.
Step 1
Clip your hair extensions in—this will give your braid that beautiful thickness in the braided bubbles. Then, brush all your hair out and remove and tangles.
Step 2
Choose which side you want to braid your hair on—this tutorial is for the left side, so bring all your hair over to the left side of your head.
Step 3
Start by creating a simple 3-strand braid. Once you have braided twice, take a small hair elastic and secure the hair just under the braid.
Step 4
Now to create that bubble effect. Tighten the elastic, then pull at the braid from all sides to create a three dimensional braid effect. Once you are satisfied with the size of the bubble, take a tiny section of hair below the elastic and wrap it around the elastic once or twice.
Step 5
Incorporate that tiny section of hair into your next braid, and create another 3-strand braid. Again, once you have braided twice, secure the braid with an elastic.
Step 6
Repeat step 4.
Step 7
Repeat steps 3 and 4 until you have reached the end of your hair.

Advanced braid hairstyle 5: spiral braid
This is actually a new take on the 3-strand braid, so you will learn a new braiding technique. This braid is so simple and easy to create, and is a great alternative for the regular 3-strand braid. Mimi uses her 160g Ombre Blonde Luxy Hair extensions for that extra thickness and volume in her braid, essential if you have thinner hair and can't seem to get your braids looking thick and voluminous.
Step 1
Clip your hair extensions in—this will give your braid that extra thickness and length. Then, brush all your hair out and remove and tangles.
Step 2
Bring all your hair to the left side of your head, where you will be creating your braid.
Step 3
Divide your hair into two sections: a smaller 1-2 inch section on the left (section 1), and the rest of your hair, which is the thicker section (section 2). A third section will be created as you braid.
Step 4
Take section 1 and wrap it around section 2. While doing so, take a third section from the right side of section 2, and join it with section 1. Then, wrap both those sections around section 2.
Step 5
Now, you should have two sections again. Take section 1, wrap it around section 2, and create a third section again, joining section 1 and 2 together before wrapping them both around section 2.
Step 6
Continue this process all the way down until you have a full braid. Then, pull gently on the wrapped around sections to create a more defined spiral effect, and you're done!


Advanced braid hairstyle 6: layered braid
This is truly the definition of an advanced braid, so strap it and get comfortable! This braid, while definitely on the complicated side, is perfect for summer festivals, special occasions, or even as a bridal hairstyle if you can master it correctly. In this tutorial, Mimi creates the layered braid on Zane, who is wearing 160g Dirty Blonde Luxy Hair extensions for added volume to her braid. Because this braid has a lot of intricacies, hair extensions are key to keeping the braid looking full and thick at the end.
Step 1
Clip your hair extensions in and brush out all your hair to remove any tangles.
Step 2
You're going to start by creating four twists at the crown of your head. Take a section of hair at your temple on the right side, and twist is toward the back. Pull on the twist slightly to fan it out and make it look more messy and voluminous. Wrap the twist around your head and pin it at the left side of your head.
Step 3
Create another twist on the left side of your head, wrap it around your head and pin it just below the first twist. Repeat again on the right and left side until you have 4 twists.
Step 4
At this point, you should already have a beautiful half-up hairstyle, however, we're going to go a step further. Separate the remainder of your hair into three sections, then create a 3-strand braid on the left most section. Once you reach the end of the braid, hold the braid tightly and the end and pull at the braid to fan it out and make it thicker.
Step 5
Repeat step 4 on the right most section of hair. You should now have two 3-strand braids with a middle section of hair loose.
Step 6
Create a fishtail braid with the middle section of hair.
Step 7
Now, we're going to pin all three braids together. Take a bobby pin, secure it to the top of the right 3-strand braid, weave it through the middle fishtail braid, and secure it to the left 3-strand braid. Continue this process with another bobby pin in the middle of the braid, and one more at the bottom.
Step 8
Finally, take a small elastic and secure everything together at the bottom.

Advanced braid hairstyle 7: double braid
Want to learn a new hair trick? We've got one for you in this tutorial, to create a double braid quickly and easily. If you want to show off this braid in the best way possible, try adding two shades of Luxy Hair extensions as Mimi has done here with her 160g Ombre Blonde and 160g Ombre Chestnut sets, which not only add thickness and length to the braid, but also add color dimension and depth, to show off the intricacies of the hairstyle.
Step 1
Pull your hair to the side you would like your braid to be on, and separate the hair into two sections.
Step 2
Starting with the outer section create a three strand braid and secure it with an elastic.
Step 3
Gently pull on the inner half of the braid to create small loops.
Step 4
Move to the other section of hair, and start a three strand braid.
Step 5
As you make your way down the braid, take the section of hair closest to the looped section of the first braid, and weave it through the loop.
Step 6
Continue weaving sections of hair through the loops as you make your way down the braid.
Step 7
Secure the braids together with an elastic band.
Step 8
Carefully fanout the second braid for extra volume. Complete the hairstyle by bobby pinning any hairs that need to be pinned down.
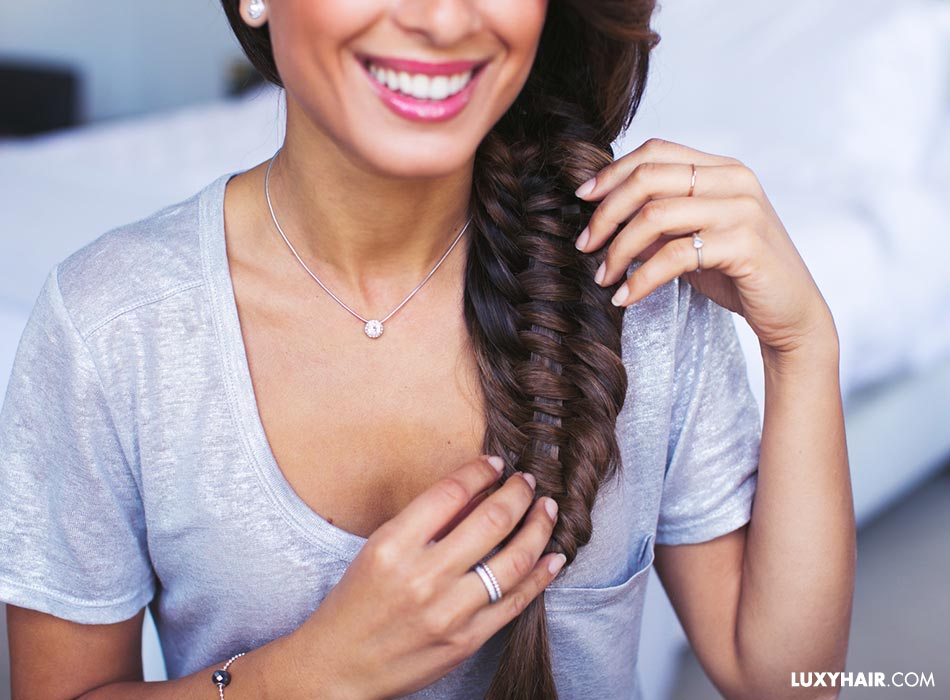
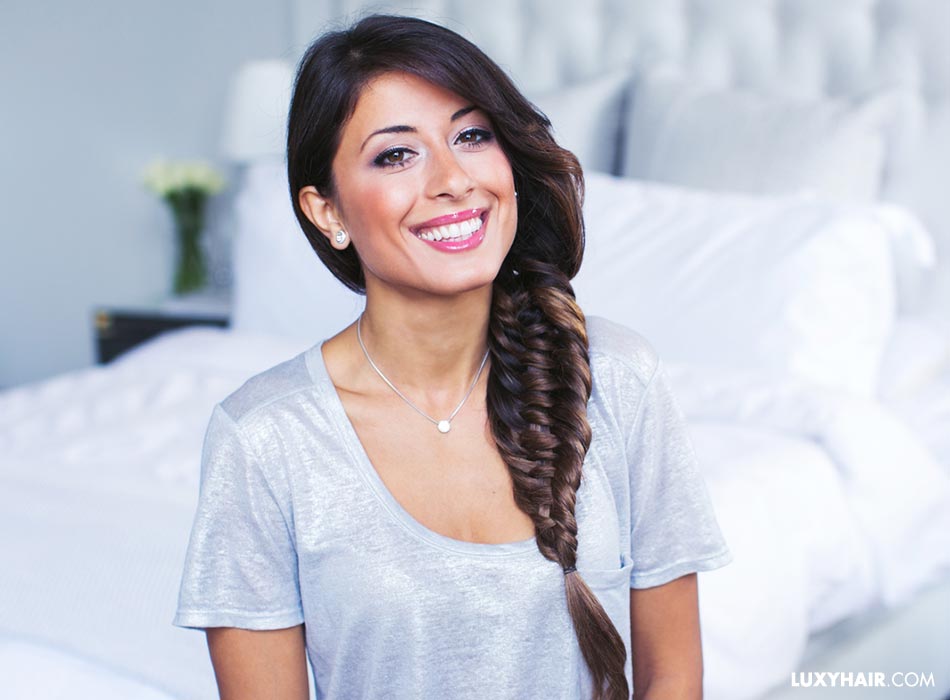
Advanced braid hairstyle 8: 3-strand fishtail braid
We absolutely love fishtail braids and wear them quite often, but this new fishtail braid with a little twist is for those days when you want something a bit different, yet beautiful and easy to create. While this 3-strand fishtail braid sounds and looks a bit complicated, don't be fooled! It just takes a few minutes to master, and the final result is completely worth it.
For added volume and length in her braid, Mimi wears her 160g Ombre Chestnut Luxy Hair extensions.
Step 1
Clip your hair extensions in for extra thickness and length, then brush any tangles out.
Step 2
Bring all your hair around to one side of your head, then separate the hair into three sections: a thicker left section, a thinner middle section, and a thicker right section.
Step 3
Take a small strand of hair from the outside of the left section closest to your neck, cross it over, then bring it under the middle section and join it to the right section.
Step 4
Take a strand of hair from the outside of the right section, farthest from your next, cross it over, bring it under the middle section, and join it to the left section.
Step 5
Continue steps 3 and 4 until you reach the bottom of the braid.
Advanced braid hairstyle 9: double twisted braid
This romantic, feminine braid is inspired by summer nights and long, flowing dresses. We love how the subtle twists elevate a simple braid, and by adding a few embellishments, this is the perfect bridal braid or the perfect look for a romantic night out. The key to this look is mega length and volume, so Mimi wears her 160g Mocha Brown Luxy Hair extensions to elevate the braid.
Step 1
Tease your hair at the crown and sides to add some volume to the back of your hair. Then, use a teasing brush to smoothen down the hair.
Step 2
Take a section of hair at the left side of your head and twist it toward the back, adding a bit of hair from the front every time you twist. Keep adding hair and twisting until all the hair on the left side has been twisted. Then, secure the section with an elastic.
Step 3
Repeat step 2 on the right side of your head
Step 4
Separate your hair at the back into three sections: the left twisted section, the middle section which is loose, and the right twisted section. Create a regular 3-strand braid with these sections and secure with an elastic at the bottom.
Step 5
Once your braid is complete, go through and pull on the braid to fan it out and thicken it up.
Advanced braid hairstyle 10: flower braid
You may have heard of wearing flowers in your hair, but have you ever tried creating a flower with your hair? In this tutorial, we'll show you how to transform your hair into a beautiful floral piece—no actual flowers required. Mimi wears her 160g Ombre Chestnut Luxy Hair extensions in this tutorial for added thickness, volume, and length.
Step 1
Clip your hair extensions in and curl your hair into loose, romantic waves.
Step 2
Separate a large section of hair at the left side of your head, leaving any bangs out.
Step 3
Start braiding the section into a 3-strand braid at about the middle portion of the strand, and stop braiding a few inches from the bottom, and secure the ends with a hair elastic.
Step 4
Pull out the braid at the outside, to loosen up the left section of the braid.
Step 5
To create the flower, anchor the top of the braid with your fingers, then start twisting the braid around into a circle around itself. As you twist, you will see a flower start to form.
Step 7
Bobby pin the flower down, and you're done!
And there you have it! Nine advanced ways to braid your hair, so you can take your braid game to the next level. Which braid is your favourite? Have you tried any of these braids? Let us know in the comments below.