NEW Dimensional Colors are here!

Psst..we've saved your cart!

But not for long, checkout before it sells out.

← Back
Luxy® Hair  - How To: Easy Bubble Ponytail Hairstyle
Easy Hairstyles

How To: Easy Bubble Ponytail Hairstyle

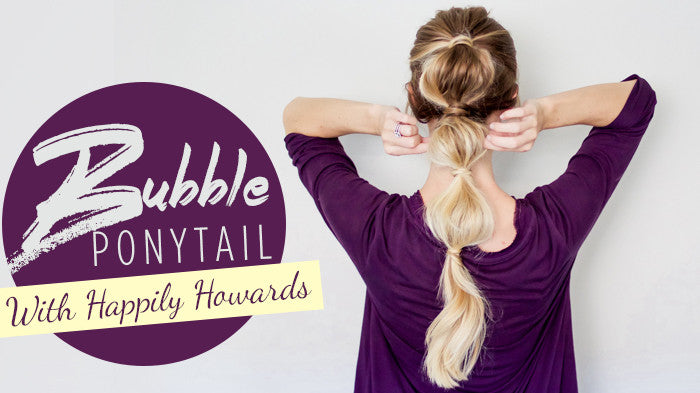
We were recently checking out our friend Erin's blog and came across this amazing Bubble Ponytail Hairstyle tutorial she created that we fell absolutely in love with! We couldn't not share this beautiful hairstyle, so without further ado, passing the mic to Erin :) (Be sure to scroll down for awesome step-by-step photo instructions)

Bubble Ponytail Hairstyle Tutorial Luxy Hair Blog - Happily Howards

Erin: So, two weeks ago, I shared that my hairstyles basically consist of straight, curly, or topknots and that I’ve been in a rut with hairstyle ideas. And because of that, I wanted to start challenging myself to be more creative with hairstyles and share them. I got a few requests for creative twists on the ponytail, specifically for busy moms that want to be stylish but don’t have tons of time. So I’ve spent a lot of time scrolling through Pinterest for fun ideas. A lot of the styles include these crazy braids that, if I’m being honest, I’m not coordinated enough to do on myself. And even though I’m not a mom yet, I can empathize with the saying, “I just don’t have time for that!”

But what I love about this bubble ponytail is how simple yet stylish it is! It took me about 10 minutes to do, and with practice, I think it would eventually take me less time. So all you busy ladies out there – be encouraged! Cute hairstyles can still be achieved even when you have a lot to do!

What  I love about this hairstyle (besides that it takes such little time) is that it’s even better with dirtier hair! Seriously – the more dry shampoo and product in your hair, the better because we want volume for this ponytail.

Also, this ponytail tutorial can definitely be done with shorter hair, but I think it’s more fun when your hair is longer because you get more “bubbles”! If you’ve been on the fence about extensions, I can’t recommend these clip-in Luxy Hair extensions enough! They’re super simple to snap in and out, and they add so much more personality to your hair!

Let's get started

To get started, you’re going to begin with whatever hairstyle you have goin’ on. I just so happened to have had my hair curled the day before, so that’s what I’m starting with. (And if you’re wondering: Yes, my hair holds curls really well and yes, this is what my hair looks like with day-old curls. Don’t hate me for it!). But this style can be done with straight hair, creased hair, and just crazy hair in general! Also, if your hair has zero volume up top, use a teasing comb and tease the top roots to give your hair some volume. I also already have my Ash Blonde Luxy Hair extensions clipped in, which I had custom colored to match my hair better. If you're interested to learn about the process and how I clipped them into my hair, check out this post! 

Luxy Hair Extensions - Happily Howards

Step 1

Pull up half of your hair and secure it with a clear elastic. I also tug on some pieces that are pulled back to give the top section of my hair some volume instead of having it completely slicked back.

Bubble Ponytail Hair Tutorial with Luxy Hair Extensions by Erin Howards

Step 2

Take a section of the hair in the half-up ponytail and wrap it around the clear elastic until you get to the end of your hair (don’t wrap it super duper tight though!). Then, you’re going to find the clear elastic underneath the ponytail (where it isn’t visible) and pull the small section of hair through the elastic so it stays in place. The only way you’ll have enough “give” to find the elastic is if you don’t wrap the hair super tight at first. Once the hair is threaded through the elastic, you can pull downwards to tighten the hair wrapped around the pony.

Bubble Ponytail Hair Tutorial with Luxy Hair Extensions by Erin Howards

The goal is to completely cover up the elastic and to not see the end of the hair section that’s wrapped around the elastic (it should be hidden under the pony).

Bubble Ponytail Hair Tutorial with Luxy Hair Extensions by Erin Howards

Step 3

Tease the ponytail. This ponytail is going to be your first “bubble” and you want it to have plenty of volume!

Bubble Ponytail Hair Tutorial with Luxy Hair Extensions by Erin Howards

Step 4

Repeat Steps 1-3 until you get to the end of your hair!

Bubble Ponytail Hair Tutorial with Luxy Hair Extensions by Erin Howards

Pro tip: Because there’s not much of a “bubble” yet, you’ll have to tug a little at this section. Remember, you teased this part of your hair for volume, so it’ll be easy to create a fuller effect!

Bubble Ponytail Hair Tutorial with Luxy Hair Extensions by Erin Howards

Bubble Ponytail Hair Tutorial with Luxy Hair Extensions by Erin Howards

Don’t forget the repeat of Step 3 – teasing the ponytail!

Bubble Ponytail Hair Tutorial with Luxy Hair Extensions by Erin Howards

Repeat all the same steps until you reach the end of the ponytail!

Bubble Ponytail Hair Tutorial with Luxy Hair Extensions by Erin Howards

Bubble Ponytail Hair Tutorial with Luxy Hair Extensions by Erin Howards

Don’t forget to tug and loosen the bubble to give it more volume!

Bubble Ponytail Hair Tutorial with Luxy Hair Extensions by Erin Howards

Bubble Ponytail Hair Tutorial with Luxy Hair Extensions by Erin Howards

Bubble Ponytail Hair Tutorial with Luxy Hair Extensions by Erin Howards

Bubble Ponytail Hair Tutorial with Luxy Hair Extensions by Erin Howards

Bubble Ponytail Hair Tutorial with Luxy Hair Extensions by Erin Howards

Step 5

Tug at all of the bubbles to loosen them up a bit and to give them a little personality. You want all of the bubbles to be about the same size (vertically & horizontally), and you want the overall look to be messy. If the hairstyle looks a little too polished for your taste, continue tugging and teasing until you like the overall look! And I always hairspray everything down to keep all of my hard work in place.

Bubble Ponytail Hair Tutorial with Luxy Hair Extensions by Erin Howards

And there you have it – A fun twist on the normal, boring ponytail! Here's a pictorial if you'd like to pin it for later:

Bubble Ponytail Hair Tutorial with Luxy Hair Extensions by Erin Howards

Y’all are the best for checking out my bubble ponytail tutorial! Again, let me know in the comments if you have any recommendations for other simple hairstyles you’d like to see in the future!

xoxo

Erin Howards

Check out Erin's Instagram and Blog!

P.S. If you want to see a video tutorial on this hairstyle, check out this tutorial where we show you how to do it step by step:

Shop the look

20" / 160 grams

20" Classic Ash Blonde Clip-Ins (160g)

$235

Related Posts See all posts

Quiz: which hair extensions are for me?

This site uses cookies to ensure you get the best experience. Learn more.

Your Shopping Bag

Your cart is empty.

Virtual Try-On

Virtual Color Match

TRY ON HAIR EXTENSIONS

We know the paparazzi can be a pain. Confirm your consent to having your photo taken below.
The Virtual Try On and Virtual Color Match tools may collect, capture, store, use, receive or obtain a photo image of your face and use that image and data for the purpose of providing you with a personalized experience.
Any photo image or data you share will not be disclosed to any third-party or stored on any server or system after your use of the Virtual Try On or Virtual Color Match tool and is not used for identification purposes.
I consent to the use of a photo of my image as described in the Virtual Try On and Virtual Color Match Information Notice and agree to all terms, including data retention, data deletion, and data use, processing storage and transfer. I agree to the Terms of Use and Privacy Policy for Beauty Industry Group and Its Affiliated brands.
Wanna try before you buy? Experiment with colors, volume, and length without the workout of an actual dressing room.

OR

Prefer to save the big reveal for IRL? We got you!
*Seasonal colors and collections may not show up in your color match and may not be available in all lengths and application methods.

Oops! The photo didn't work. Let's try again.

TIPS
The image size must be a minimum of 320 x 620 pixels and a maximum of 1700 x 3500 pixels.
The image size must not exceed 20 MB.
Position yourself in frame from the waist up
Pull your hair to the front and avoid tucking it behind your ears
Natural lighting is best, ideally in front of a window
Tilt your head slightly forward
Ensure your clothing contrasts with your hair color
Wear your hair straight for best results
No filters or edited photos
Avoid harsh sunlight on your hair and face

Results may vary depending on the quality of photo.

We asked the paparazzi for their top tips to the perfect photo.

Do VCM Thumbnail
Do
Don't VCM Thumbnail
Don't
TIPS
The image size must be a minimum of 320 x 620 pixels and a maximum of 1700 x 3500 pixels.
The image size must not exceed 20 MB.
Position yourself in frame from the waist up
Pull your hair to the front and avoid tucking it behind your ears
Natural lighting is best, ideally in front of a window
Tilt your head slightly forward
Ensure your clothing contrasts with your hair color
Wear your hair straight for best results
No filters or edited photos
Avoid harsh sunlight on your hair and face

Results may vary depending on the quality of photo.

Share a photo of your current hair

Do VCM Thumbnail
Do
Don't VCM Thumbnail
Don't
TIPS
The image size must be a minimum of 320 x 620 pixels and a maximum of 1700 x 3500 pixels.
The image size must not exceed 20 MB.
Position yourself in frame from the waist up
Pull your hair to the front and avoid tucking it behind your ears
Natural lighting is best, ideally in front of a window
Tilt your head slightly forward
Ensure your clothing contrasts with your hair color
Wear your hair straight for best results
No filters or edited photos
Avoid harsh sunlight on your hair and face

Keep your chin up and face straight ahead.

Do not Picture
VHETO Subject image

Choose Color

Vheto Result 1 image
TITLE
Vheto Result 2 image
TITLE
Vheto Result 3 image
TITLE

Choose Collection

Seamless
Classic
Halo

Choose Volume

Natural-Looking
A Little Extra
Full Blast

Choose Length

12 INCH
16 INCH
20 INCH
24 INCH

Results may vary depending on the quality of photo.

*Seasonal colors and collections may not show up in your color match and may not be available in all lengths and application methods.
Do not Picture

YOUR COLOR OPTIONS

Still not sure? You can contact our customer service team for hep with your color match. Contact Now
Do not Picture

Your color match is

CHOOSE COLLECTION

Seamless Hair Extensions
SELECT
Classic Hair Extensions
SELECT
Halo® Hair Extensions
SELECT
Clip-In Ponytails
SELECT
Clip-In Buns
SELECT
Preview swatch image

Compare Methods

Do Picture

Test

APPLICATION
LENGTHS
PER PACK
BEST FOR
Seamless Collection VCM

SEAMLESS

APPLICATION
Clip-ins. Made with a thin, silicone band that lays flat against your head
LENGTHS
12", 16" and 20"
PER PACK
10 pieces
BEST FOR
Thin to medium hair types, suitable for hair past the shoulders
Classic Collection VCM

CLASSIC

APPLICATION
Clip-ins. Made with a fabric-stitched band that adds extra volume at the root
LENGTHS
16", 20" and 24"
PER PACK
10 pieces
BEST FOR
Medium to thick hair types, suitable for short hair to long hair
Halo Collection VCM

HALOS

APPLICATION
Single weft application, secured with an undectable wire and clips. Also comes with two 2-clips for additional blending
LENGTHS
16" and 20"
PER PACK
3 pieces
BEST FOR
Thin to medium hair types, suitable for hair past the shoulders