Shoutout to all the ladies who deal with curly, wavy, and frizzy hair every day. No amount of product, hot tools, or love and care can ever fully end a frizz battle — but today, we're going to show you a few ways to embrace it. With these easy hairstyles for frizzy hair, you'll gain tips and tricks to tame and maintain your mane. Let's get started!
Looking to tame frizz before you style? Read our guide on how to tame frizzy hair →
Add volume and length to any of these styles.
Both Alex and Mimi clip in a few wefts from their Luxy Hair Clip-In Extensions to give these looks extra fullness — especially helpful when frizz makes your hair feel flat or unmanageable.
Shop Clip-In Extensions →#1: The One-Minute Messy Top Knot Bun
In a rush? Here's the perfect hairstyle to keep that messy, textured look and still capture some style at the same time. Alex is wearing her Ash Blonde Luxy Hair extensions for extra length and volume.
-
1Take the top section of your hair and tease it to add texture, making it easier to pin in place.
-
2Gather that section into a messy bun however you like and secure with a clear elastic.
-
3Use bobby pins to tidy up any strands that stick out and to further secure the bun.
-
4Optional: Pull out a few pieces of hair at the front to frame your face and keep that relaxed, effortless look.
-
5Finish with a little hairspray to keep the look in place throughout your day.

#2: The Double Knot
Looking for something simple for your natural curls? This one comes together in seconds. You can find this hairstyle from 0:00–2:01 in the video below.
-
1Take a small section of hair from the right side and a small section from the left side.
-
2Bring both sections to the back of your head and knot them together.
![How to knot hair sections together for double knot hairstyle]()
-
3Leave a small gap below the first knot and create a second knot just underneath it.
-
4Secure the last knot with one or two bobby pins.
-
5Curly hair texture will naturally help this hold, but add another bobby pin and a touch of hairspray if you need extra security.


Frizzy Hair Tip: Next time you need to tame flyaways, skip the harsh serums and reach for a tiny amount of coconut oil instead. Smooth it over your hair after styling to lock in shine and prevent frizz without weighing it down.
#3: Faux Knot Braid
The Faux Knot Braid is the ultimate go-to for a night out when you're not sure what to do with your hair. It looks intricate but is surprisingly simple — and braids are excellent at keeping frizz contained all night.
-
1Brush your hair out to ensure there are no tangles.
-
2Take a small section from the right and left sides and knot them together.
-
3Secure the knot with a small elastic.
-
4Take another small section from the right and left sides just below the first knot, create another knot, and secure with a small elastic. Tip: Continue braiding in the back and avoid bringing it to the side — this keeps the knots aligned and centered.
-
5Repeat all the way down to your desired length.
-
6Optional: Pull out a few pieces at the front to frame your face for a more relaxed, effortless look.

#4: The High Bun
Perfect for hot, sticky days when you want everything up and out of your face. Mimi is using her Ombre Blonde Luxies for extra length and volume to get a fuller bun. You can find this hairstyle in the video below.
-
1Gather all your hair into a high ponytail and secure with a hair elastic.
-
2Wrap your hair around the ponytail base to form a bun. Tip: If you have curly but fine hair, tease the ponytail with a teasing brush first for added volume.
-
3Fluff the bun with your hands as you shape it to make it nice and full.
-
4Pin in place with bobby pins and finish with hairspray if you'll be moving around.

#5: Two-in-One Braid
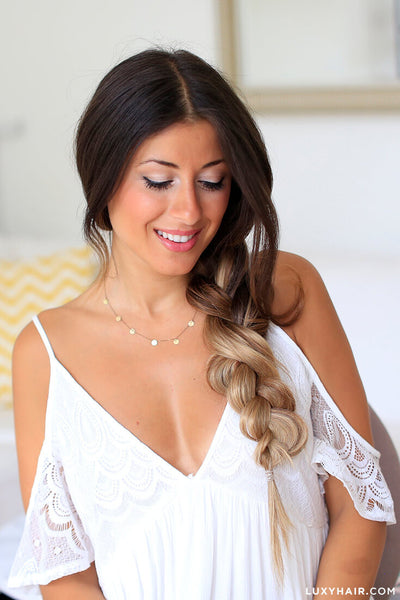
A classic braid is one of the best ways to keep frizzy hair contained while looking polished. This two-in-one style switches from a regular braid to a Dutch braid halfway down for a unique effect. Mimi is using her Ombre Blonde Luxies to help achieve this look.
-
1Separate your hair into three sections and bring to one side.
-
2Begin with a regular three-strand braid: take the right section and cross it over the middle, then take the left section and cross it over the middle. Continue this pattern.
-
3Repeat the regular braid until you're about halfway down.
-
4Switch to a Dutch braid: take the right section and cross it under the middle, then take the left section and cross it under the middle. This reversal creates a raised braid effect.
-
5Continue the Dutch braid to the end and secure with a hair tie.
More hairstyle inspiration
How to Tame Frizzy Hair: Tips & Tricks → How to Fishtail Braid: Step-by-Step Tutorial → How to Do a Dutch Braid: Tutorial for Beginners → 9 Bun Hairstyles & Top Knots for Every Hair Type → 8 Super Quick & Easy 2-Minute Hairstyles →So there you have it — 5 ways to turn the frizz curse into a blessing! If you recreate any of these looks, tag us on Instagram @luxyhair and drop any questions or suggestions in the comments below.